Importing Images
When you initially imported your Product/Category information, if you placed a URL in the Product Image field, Sales Layer automatically downloads the images from these URLs, so that they can be stored internally.
Warning: The image URL must have a structure that allows Sales Layer to recognize the image name. URLs containing &id=, &path=, &file=, etc., or URLs without the image extension (like .jpg, .jpeg, ...) are not permitted.
Warning: It is important to remember that images and files are case sensitive. The names, including the extension, must be exactly the same in all places to ensure they link properly.
If we want to import images into an image type field that already has images linked to an item, we can do so, by adding ++ in front of the image we want to add. This way, it will be added to the already linked content, without overwriting.
Besides this, there are a number of other options for importing images which can be found by selecting Images from the main menu. Let's start with the most basic...
Manually importing images, either, individually or in bulk via a zip file (with a maximum size of 250MB) Sales Layer will automatically unzip the file and upload the images into your library inside the PIM.
Note: If you have a zip file that exceeds the 250MB limit, you can use an external sync list (FTP or Dropbox). In addition, external syncs will allow you to automatize imports.

Warning: The maximum resolution of the images must be 30,000 x 30,000 and 2GB. If you exceed this limit you will not be able to import them.
You can also upload images and documents even more intuitively and quickly. Drag and drop files from your computer directly into your library space or the desired destination folder (if you have extended DAM). This option allows you to import up to 20 files without needing to use additional options.
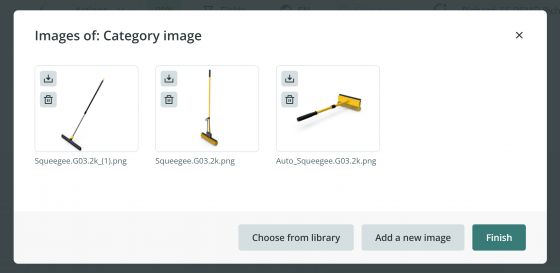
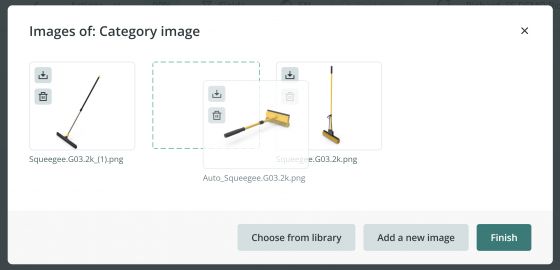
You can also rearrange the images in its field. To do so, click on the Edit button and simply drag the images to the position you want.

Another method offered by Sales Layer for importing images, recommended for larger uploads, involved external synchronization with a CSV or Text file that includes image URLs.
Warning: The file library allows you to upload files in zip format using the drag-and-drop option. This way, the zip file is uploaded and stored in your library without being unzipped.
On top of this, there are also ways to upload large quantities of images in bulk. This can be done via an external synchronization with a CSV or Text file containing your image URLs. The weblink which holds the CSV or text works with either an HTTP or FTP path. Typing “ftp:”, for example, the system will automatically display the extra options for entering your FTP access data. After that, straightforwardly identify which column of the file contains the image information, and then select the frequency of the synchronization.
Here are some considerations to take into account, depending on the way you work. If you delete the FTP file every time it is used, instead of modifying it, you will have to wait for the validation of the file. In this case, it is recommended to use a less frequent synchronization time, considering that the synchronizations will depend on the amount of images to be uploaded.
Note: If you want to add folders within our FTP, the path of the images cannot start with bars (/).
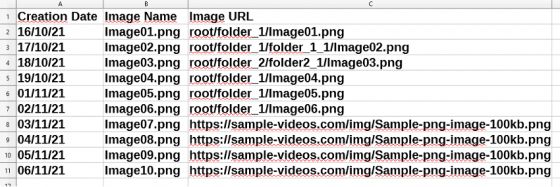
Another important aspect is the path that the images follow. Sales Layer will take as root the directory where the CSV is located. For example, if our CSV is inside the Sales Layer folder - having a tree-like Sales Layer > root > folder_1, our image path will be root/folder_1/Image01.png.
Note: Please, note that the file name must not be enclosed in inverted commas.
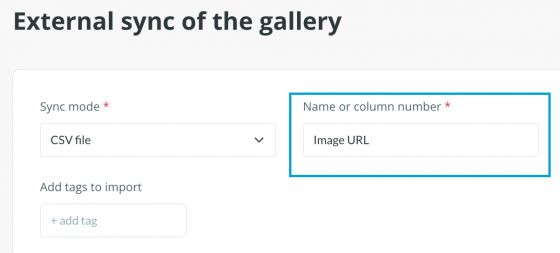
In the case of several columns, as we see in the screenshot above, the column to be synchronized must be specified:
Warning: Your server might deny the connection with our service when using image URLs with http or https, because it interprets it as a massive download. In this case, add the following IPs to the white list: 52.16.19.36 / 34.252.100.48 / 52.16.206.155 /52.16.132.188
Finally, one of the most popular options is to connect Sales Layer to your Dropbox account. Once you have linked the two platforms Sales Layer will automatically create a folder inside your Dropbox where you can upload your images. From here, they will be synchronized to Sales Layer with the frequency you select, via the Refresh Period dropdown box.
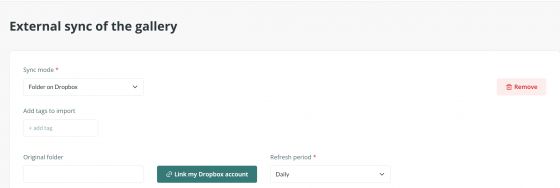
When using Dropbox it’s important to be aware of the following:
- If you delete an image in the Dropbox folder, it won’t be deleted in Sales Layer. This is to avoid that, if one of your users accidentally deletes the Dropbox folder, all of your images disappear from Sales Layer.
- Also, If you delete an image in Sales Layer that was uploaded via your Dropbox or through an external sync, the image will not get uploaded to Sales Layer again on the next synchronization. This is to avoid a loop in which you delete images from Sales Layer which then keep getting uploaded. If you would like to re-upload images from Dropbox that have been deleted in Sales Layer, you will have to remove the Dropbox connection and then link it again.
As a final note, we would like to remind you that if you import your images via the Images section, they will be stored in Sales Layer, but will not appear with your products, categories, or elsewhere unless you create a link to them. This can be done when importing (by using the name of the image file in the Product Image field), or by editing products manually. In addition, you can add more than one image to a product. Directly separate each file name or URL with a comma, and they will all be linked to the Product.


Please note that you can add images in bulk. In this case, you justseparate them with commas, so, you can import several images simultaneously.
When importing images through a URL that pulls from a webpage, it needs to be open access and that it does not ban external access (protection to avoid hotlinking). Otherwise, you will need to give the Sales Layer domain access to the website.
Concerning not-uploaded images, it is possible to have a product or variant with the image’s name, without the image being uploaded and thus the image will not appear. To locate the images that are not uploaded, you can go to images and choose the option Find missing files.
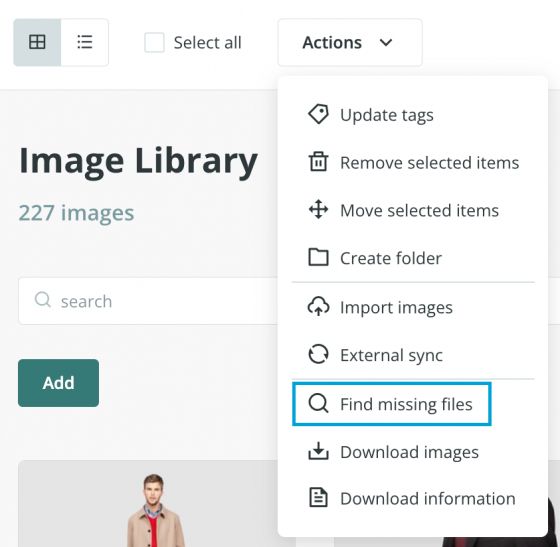
There are several reasons why images would not be linked to a product or variant (for instance, images uploaded via Dropbox for further use). In that case, remember that in the images section, you can filter to locate the ones not linked yet.

It is also possible to download a CSV with information on your whole images or files library. To download the information of the entire library, once you are in the images or files section, go to Actions > Download list.
Warning: It must be considered that all the URLs that we generate are NOT static but will change whenever you modify or update anything related. This applies to both image and file URLs.