Activity Register & Item Sync Status
Activity register
Once the connector is configured, the activity log tab will show if there is any synchronization in progress, when was the last one, and when the next one will start. Once the synchronization is finished, we will be able to see if it was successful or if on the contrary some errors were detected.
Note that there are two types of information validation: one performed by Sales Layer, and the other by Amazon. The first validation is local and simply checks that the format is valid and that the conditions required by Amazon are met.
This first validation only returns one error at a time, so if a product has more than one error, we will only see the first one. Once we correct it and the next synchronization is performed, the second one will appear, and so on with as many errors as it contains.
The second validation is performed by Amazon. If the information is correct, the product will be synchronized and will appear in the Amazon pane. If it contains errors, it will indicate what is not correct in each of them.
Depending on the chosen synchronization mode (test synchronization or synchronization), the validation will be performed in Amazon's test environment or in production.
Synchronization status of the item
In this tab you can get a more detailed report on the status of the synchronization, the items sent, and possible errors that have occurred.
By default, once we access this tab, the results of the last synchronization will be displayed, but we can also use the available filters to search for the necessary information.
- Reference: It allows you to look for a specific article on synchronization. It can be a category, a product, or a variant. You can even type a part of the reference and it will filter all the articles that match your entry (in the case you have more than one product starting with the same characters).
- Status:
- All: It shows the elements with all possible statuses.
- Error: It shows only the items with errors.
- Pending: It shows the items that are waiting to be synced. This means that, during a synchronization in progress, they are included and will then end up in the "Error" or "Done" status when the synchronization ends. If this status is displayed, it means that the synchronization has not finished yet. Should this status persist after a long time (beyond the normal duration of a synchronization), the synchronization might have been unexpectedly interrupted and could not take its course.
- Finished: It shows the items that have been successfully synced.
- Type: It allows you to filter by Categories, Products, or Variants as a group.
- Synchronization date: This filter allows you to select the elements involved in one or more synchronizations. By selecting a date, you will be able to see all items that have been synced since this specific date.
Once the desired filters have been selected, click on the filter items button to apply them.
In the first section, you can have an overview of the results:

In the second section, the breakdown for each item is shown.

If the status is "Error", by clicking on the arrow, you can see its details:
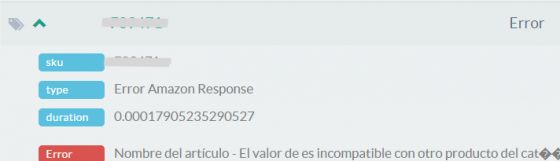
In the "type" field we will be able to see if the error obtained comes from the first validation performed by Sales Layer, in which case we will see "error validation", or if it comes directly from Amazon where we will see "error Amazon Response" as in the example above.
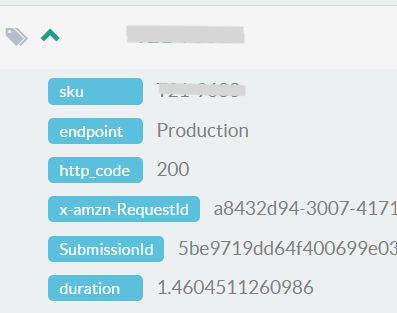
Once we are no longer sending our data in test synchronization mode, and the data transfer is successful, new details will be displayed as in the example below. As you can see the “endpoint” will indicate “production”.
By default, the table shows only 25 items but you can click the view more button to expand the results.
Depending on the type of error that appears in the logs, you may need to open an Amazon support ticket. In case our support team tells you so, we show you below the steps to follow.
To make communication with Amazon more efficient, you should include the ex-amzn-RequestID provided for each item in the "Item sync status" tab.
How to open a support ticket on Amazon
Depending on the type of error that appears in the logs, you may need to open a support ticket on Amazon. In case our support team indicates you to do so, here are the steps to follow.
To make communication with Amazon more efficient, you should include the ex-amzn-RequestID provided for each item in the "Item sync status" tab.
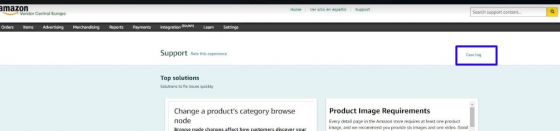
- Log in to your Amazon Vendor account and open the Support section.

- Click on Case log and then on Contact us with a new case.

- Select your business group.
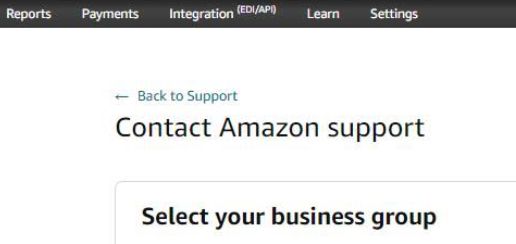
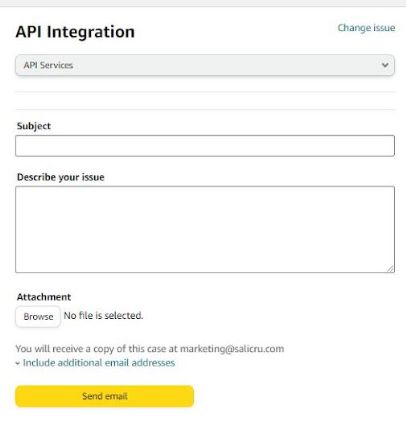
4. Choose the option API Integration> API services> send email.

- Describe the issue and attach any additional details provided by the Sales Layer support team (if necessary).
- Indicate the ID case to the Sales Layer support team.
Should the Amazon team require these details: marketplace ID, API, and operation you can indicate the following:
- Marketplace ID (country): enter your marketplace code. You can find it by clicking on this link: https://developer-docs.amazon.com/sp-api/docs/marketplace-ids
- API: Listings Items API
- Operation: putListingsItems