After uploading images or files to Sales Layer, you need to link them to the items that will use them.
Uploading an asset to the library does not automatically make it appear in an item. To associate it with information in Sales Layer, you need to add it to an image or file field.
This process can be used with items in the Products, Variants, Categories, and Custom Entities tables.
You can link one or multiple assets within the same field. For example, an item can have several photographs in an image field or different documents in a file field.
Before you start
Check that the form of the table you want to work with contains the required fields:
- An image field for photographs, illustrations, or logos.
- A file field for datasheets, manuals, certificates, videos, or other documents.
Image and file names are case-sensitive. The asset name and extension must be written exactly the same way in the library, the item, and the files used to import information. For example, item-100.jpg and Item-100.JPG are considered different file names.
Link an asset from an item form
To manually link an image or file:
- Open the table you want to work with, such as Products, Variants, Categories, or a Custom Entity.
- Find the item you want to edit.
- Select the item to open its form.
- Locate the image or file field.
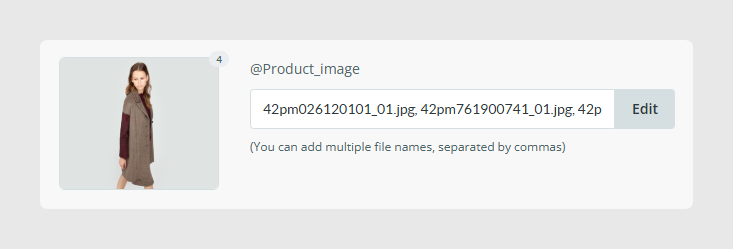
- Select Edit.
- Use the Add a new image option to upload an asset from your device or select Choose from library to use an image or file already uploaded to the library.
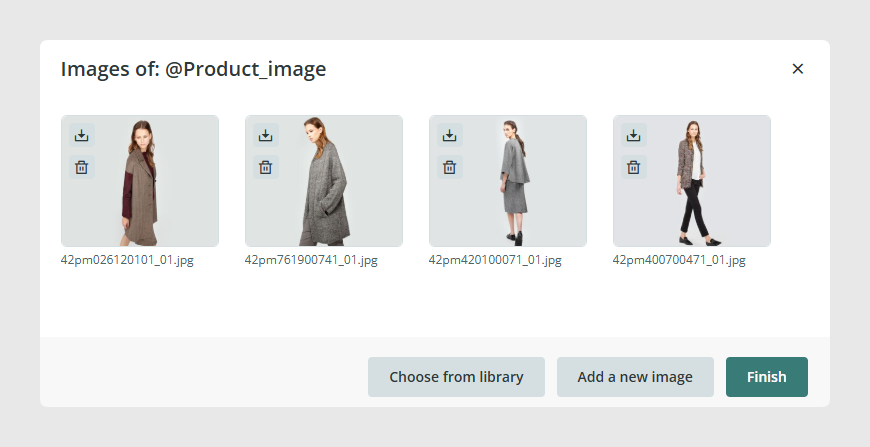
- Select the image or file you want to link.
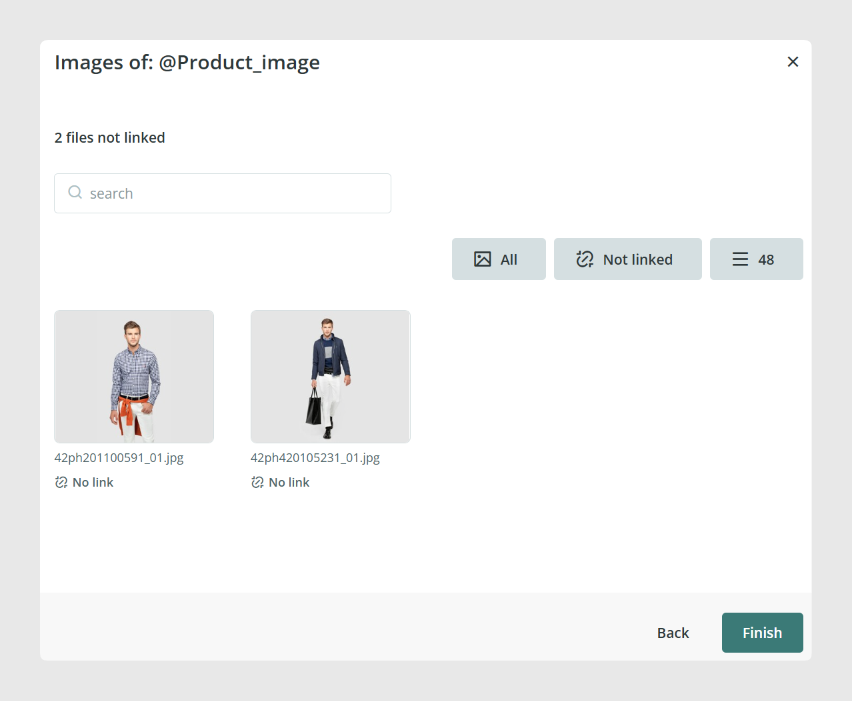
- Save the changes with Finish.
Once you save the changes, the asset will be linked to the item. The same asset can be linked to different items. This allows you to reuse, for example, a general manual, certificate, logo, or shared image without having to upload multiple copies to the library.
Linked images will appear within the same field. The order in which they appear can be important when the information is sent to an online store, marketplace, or other channel.
Link assets automatically with Linking Patterns
If your account includes DAM Advanced, you can use Linking Patterns to create rules that automatically associate images or files with items based on their file names and item information. Linking Patterns can be used with items in the Products, Variants, Categories, and Custom Entities tables.
For detailed information about creating, testing, and applying these rules, see the Linking Patterns article.
Link images and files through an import
You can also link assets in bulk using an Excel, CSV, or XML file.
The import file should include:
- A column containing the item reference.
- A column for each image or file field you want to update.
- The exact names of the assets that should be linked.
For example:
| Reference | Images |
|---|---|
| ITEM-001 | item-001-front.jpg |
| ITEM-002 | item-002-front.jpg |
During the import, map the Reference column to the corresponding item reference and the Images column to the corresponding image field.
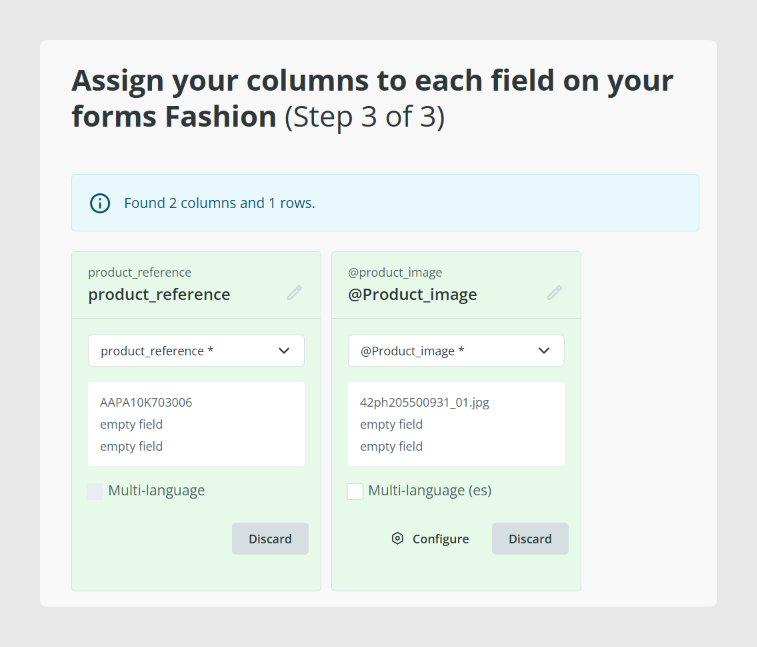
The assets must be available in the library to display correctly. You can also import images using valid URLs, provided that Sales Layer can access them and identify the file name and extension.
Import multiple images or files into the same field
To link multiple assets through an import, enter their names in the same cell and separate them with commas.
For example:
| Reference | Images |
|---|---|
| ITEM-001 | item-001-front.jpg,item-001-side.jpg,item-001-back.jpg |
In this example, all three images will be linked to the same item within the Images field.
Always use the complete file names, including the extension:
item-001-front.jpgitem-001-side.jpgitem-001-back.jpg
Avoid adding unnecessary spaces or changing the capitalization of the file names.
Add assets without removing existing ones
When you import a new value into an image or file field that already contains assets, the previous content may be replaced.
To add an asset without removing those already linked, use the ++ operator before the file name.
For example, if the item already contains these images:
product-001-front.jpg,product-001-side.jpg
You can add a new image by importing:
++product-001-back.jpg
Sales Layer will add the new image and keep the existing ones.
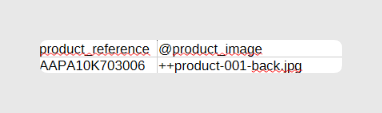
The ++ operator should be used in fields that support multiple values, such as image and file fields.
Remove an asset without clearing the field
To remove a specific image or file without deleting the other assets in the field, use the -- operator.
For example:
--product-001-side.jpg
Sales Layer will remove that asset from the field while keeping the remaining linked images or files.
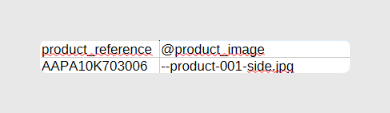
Removing an asset from an item field only removes its link to that item. The asset can remain available in the library and linked to other items.
Change the image order
To change the order of linked images from an item form:
- Open the item.
- Locate the field containing the images.
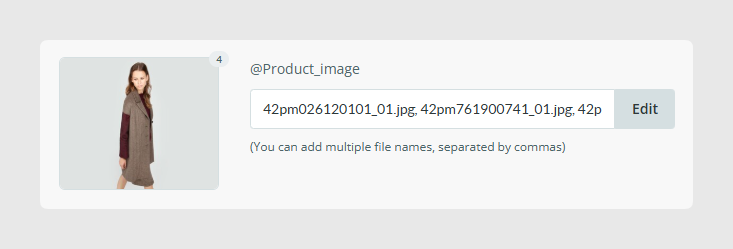
- Select Edit.
- Click and hold the image you want to move.
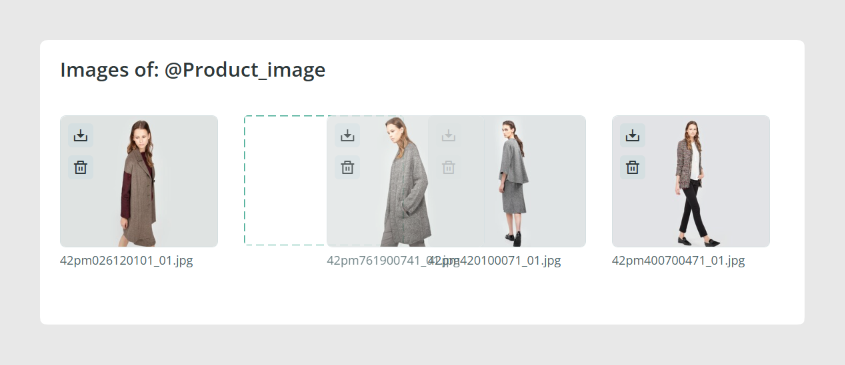
- Drag it to the desired position.
- Save the changes with Finish.
The order configured in the field is preserved in Sales Layer and can be used when sending images through connectors. Review the destination channel configuration to check how it uses the first image and any additional images.
Troubleshoot linking issues
The asset is in the library but does not appear in the item
Check that the image or file is linked to the corresponding field in the item. Uploading an asset to the library does not automatically link it to items.
You can link it from the item form, through an import, or automatically using a configured Linking Pattern.
The file name is written differently
Check the capitalization and file extension.
For example, if the library contains image-001.jpg, do not use Image-001.JPG in the import.
The field shows an incorrect value
Check that the imported file name corresponds to a valid asset and that the column has been mapped to an image or file field.
In editable mode, a cell may appear in yellow when Sales Layer receives an invalid value and removes or corrects it.
The image appears as missing
The file name may be stored in an item even though the image has not yet been uploaded to the library.
To locate these cases:
- Open Images from the Sales Layer main menu.
- Open the Actions dropdown.
- Select Find missing files.
- Review the names shown in the results.
Common Use Cases
You can use these methods to:
- Link images and files to Products, Variants, Categories, or Custom Entities.
- Add a main image and several additional images to an item.
- Link datasheets, certificates, manuals, and other documents.
- Reuse the same asset across different items.
- Automatically associate assets in bulk using Linking Patterns.
- Add new assets through a bulk update.
- Remove a specific asset without changing the others.
- Change the order in which images are sent to channels.
- Detect images referenced by items that have not yet been uploaded.
Best practices
Use a clear and consistent naming convention to make assets easier to link. Including the item reference in the file name usually makes each asset easier to identify and can also simplify the creation of Linking Patterns.
Before performing a bulk update, check whether you want to replace the entire contents of the field or only add or remove specific assets. Use ++ and -- when you need to preserve the remaining values.
If you use Linking Patterns, test the rule with a small number of assets before applying it to the complete library.
Review the image order before synchronizing information with a channel, especially if the destination platform uses the first image as the main image.
Finally, test imports with a small number of items before updating the entire catalog. This allows you to verify file names, separators, and the resulting asset links.
Was this article helpful?
That’s Great!
Thank you for your feedback
Sorry! We couldn't be helpful
Thank you for your feedback
Feedback sent
We appreciate your effort and will try to fix the article