If your account includes DAM extended, you can organize your image and file libraries in Sales Layer by creating folders and subfolders. This helps you keep large libraries easier to manage and makes it simpler to find, move, import, and export files later.
This functionality is available for Enterprise and Enterprise + accounts, although it may need to be activated separately.
Import an existing folder structure
If you already have folders and files prepared outside Sales Layer, you can import that structure into the platform.
Compress the folder structure into a .zip file, go to the Images or Files section, click Add, and select the file you want to upload.
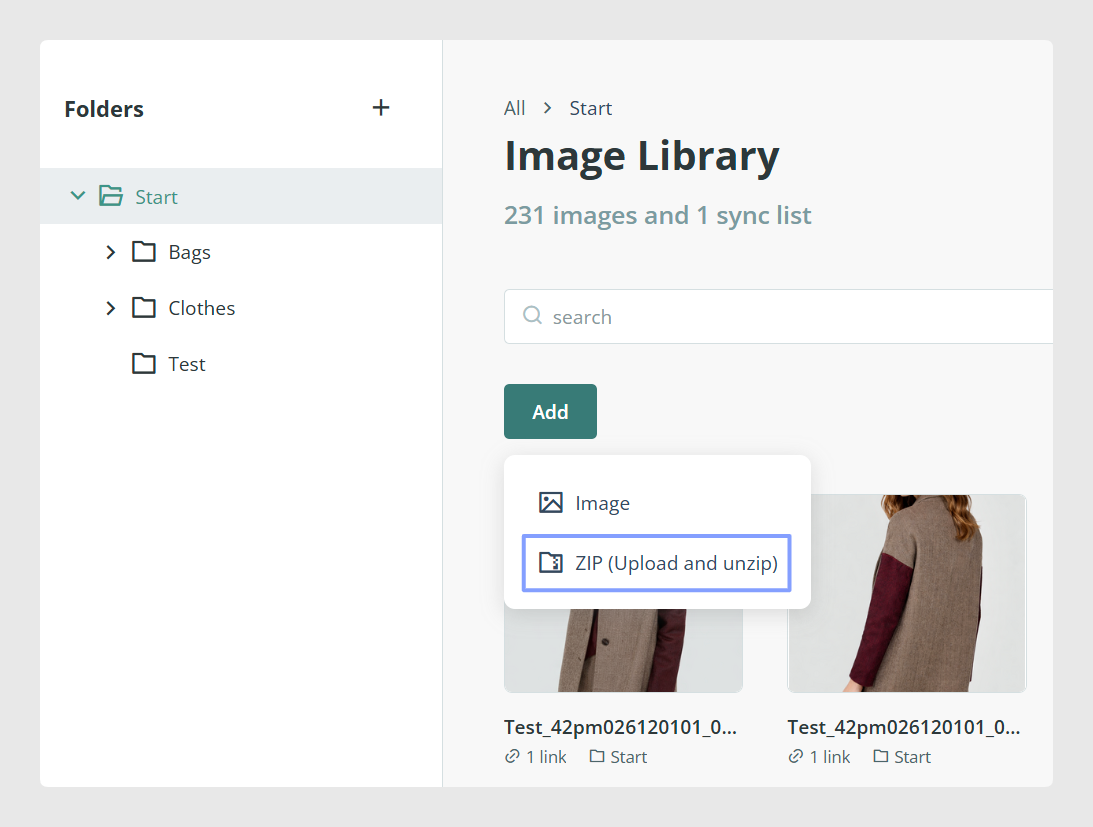
After selecting the file, Sales Layer displays a pop-up message asking if you want to import the folder structure from the file. Click Yes to keep the folder structure included in the .zip file.
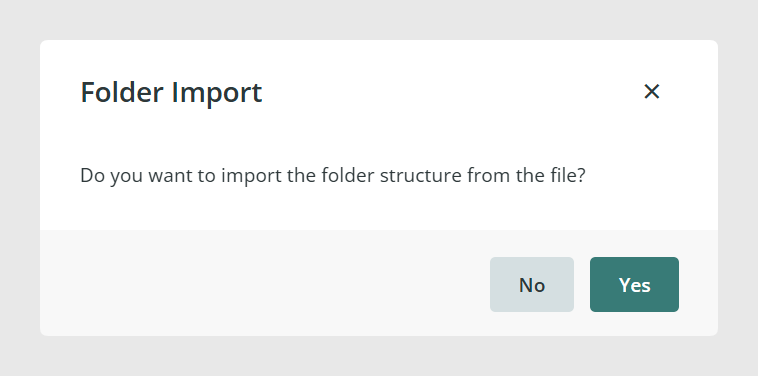
Sales Layer imports the folder structure together with all the files it contains.
Create folders and subfolders
In the Images or Files library, you can create folders and subfolders to organize your content.
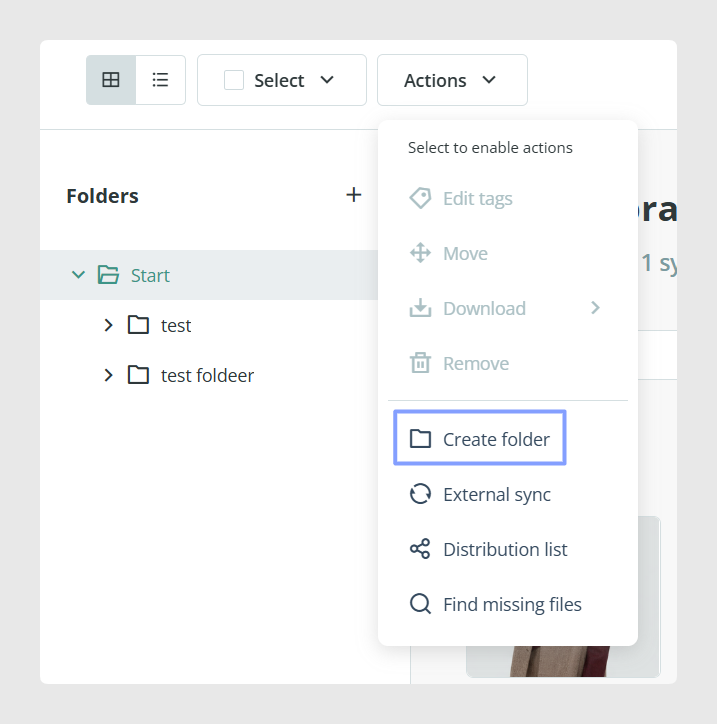
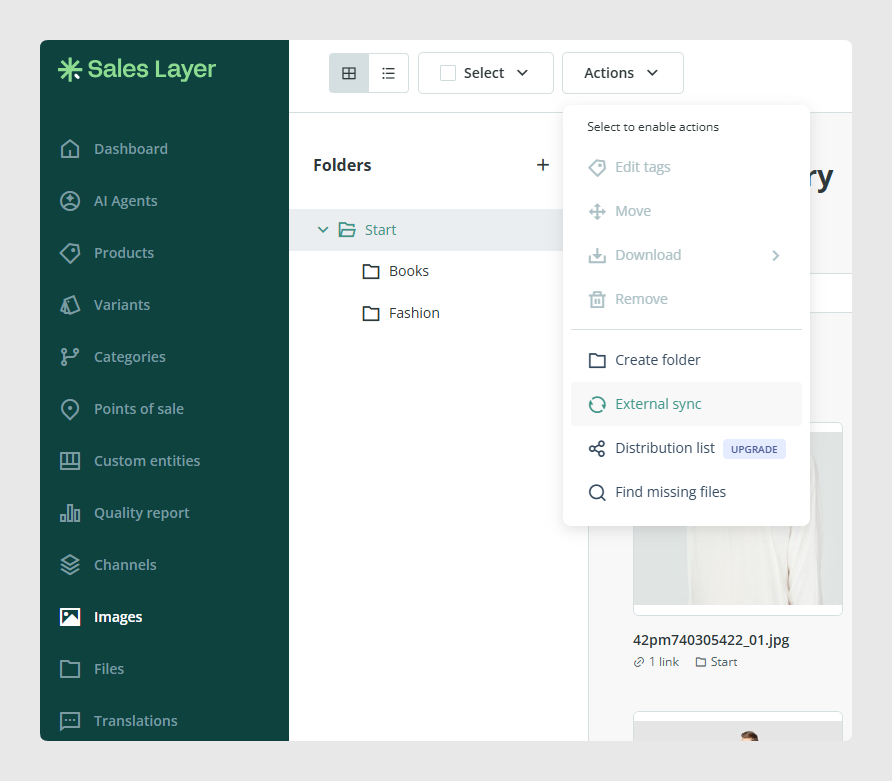
To do this, go to Actions and select Create folder. You can also use the + symbol in the folder tree to create a new folder directly from the structure view.
If you need to manage an existing folder, use the three dots next to the folder name to rename, move, or delete it.
Export a folder structure
To export a folder structure from Sales Layer, go to the Start folder and then open Actions > Download images.
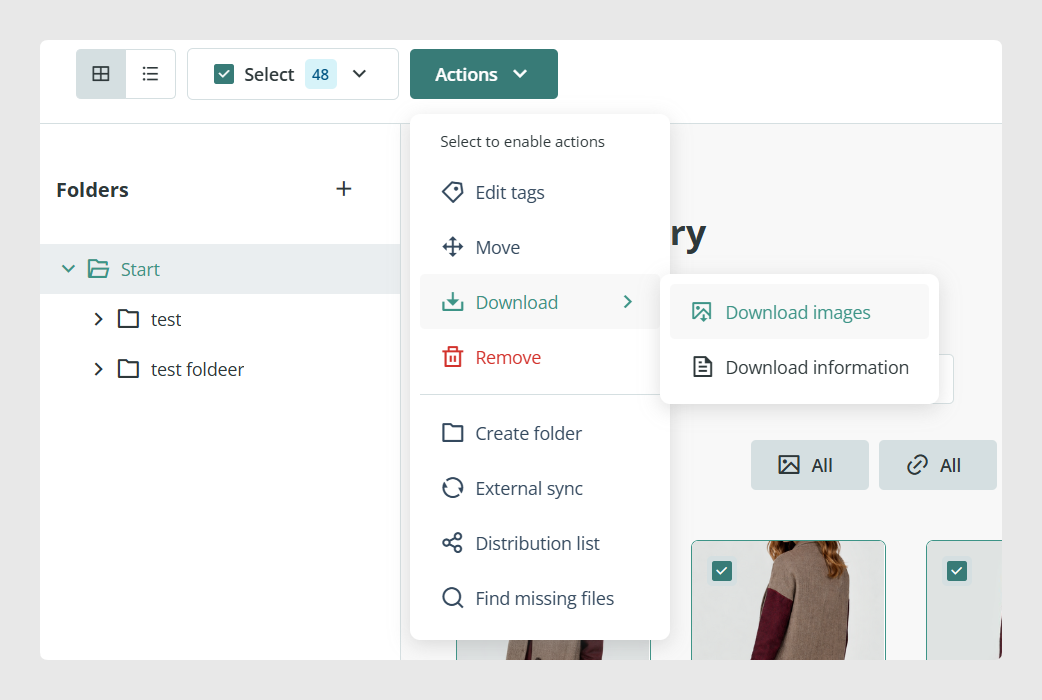
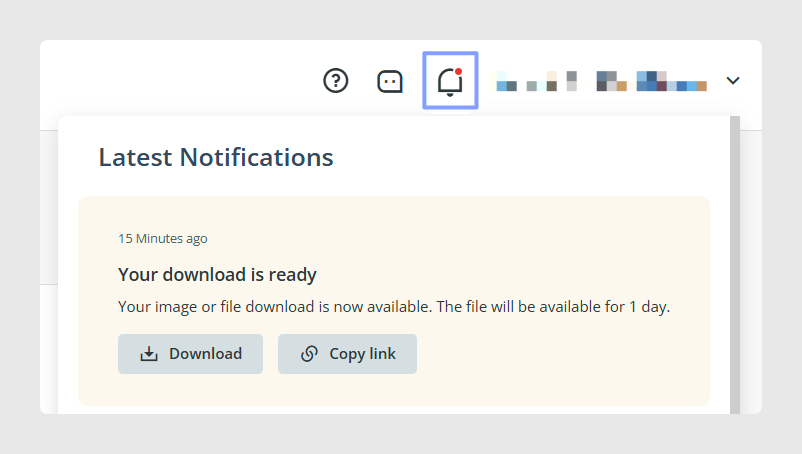
A pop-up message will confirm that your file is being prepared. When it’s ready, you’ll receive a notification with a download link.

Move files between folders
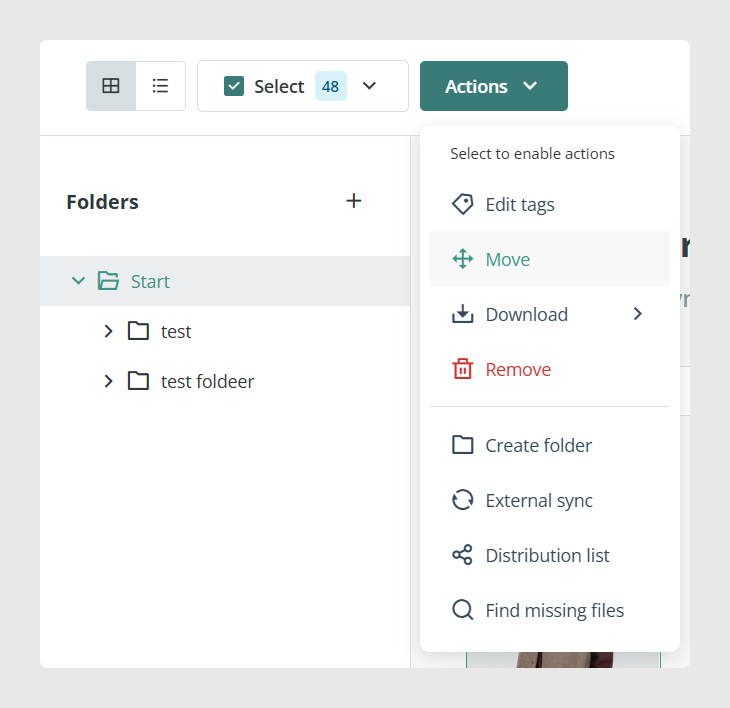
If you need to reorganize your library later, select the files you want to move and go to Actions > Move. This lets you relocate files from one folder to another without reuploading them.
Import folder structures automatically using external sync
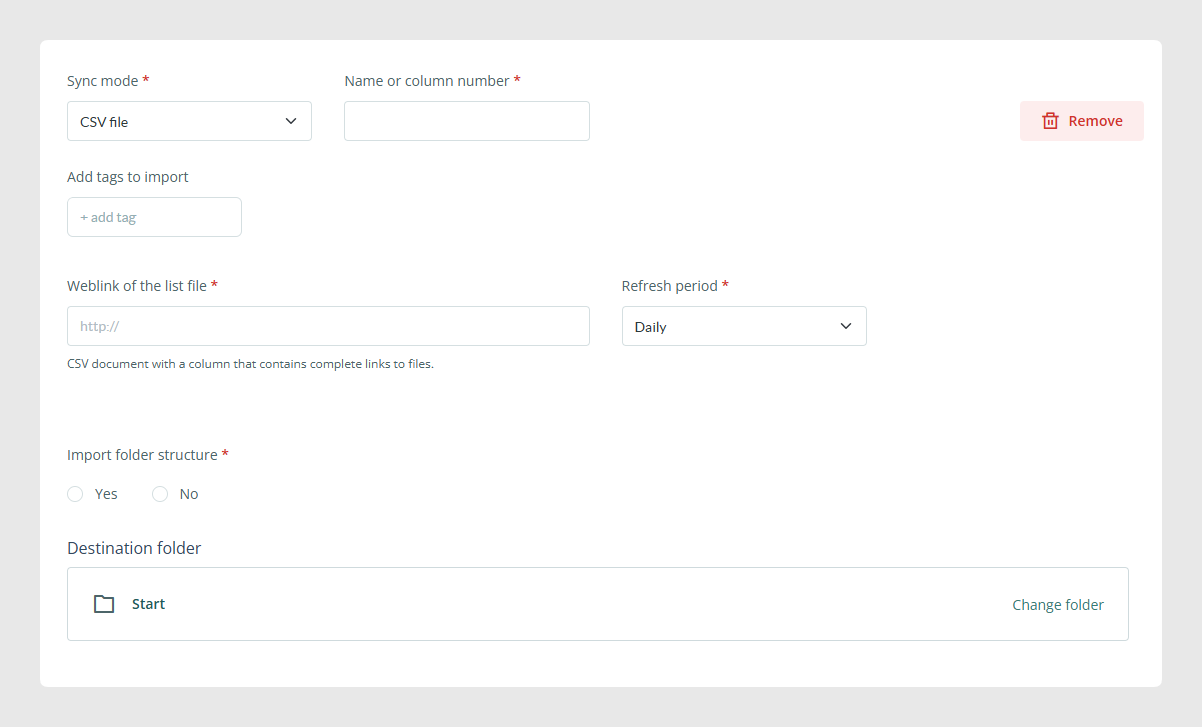
You can also import a folder structure together with all its files through an automatic external synchronization. This is useful when you want to keep the same structure without selecting a destination folder manually each time.
Keep in mind that once a file is synchronized into a folder, it stays in that original folder in future syncs. If you need the file to appear in a different folder, you must move it manually. Scheduled syncs do not relocate existing files automatically.
Find where files are stored
You can find files by browsing the folder tree or by using the Search Bar.
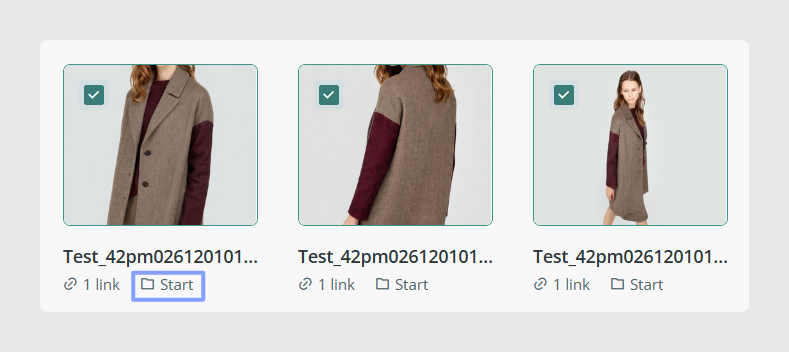
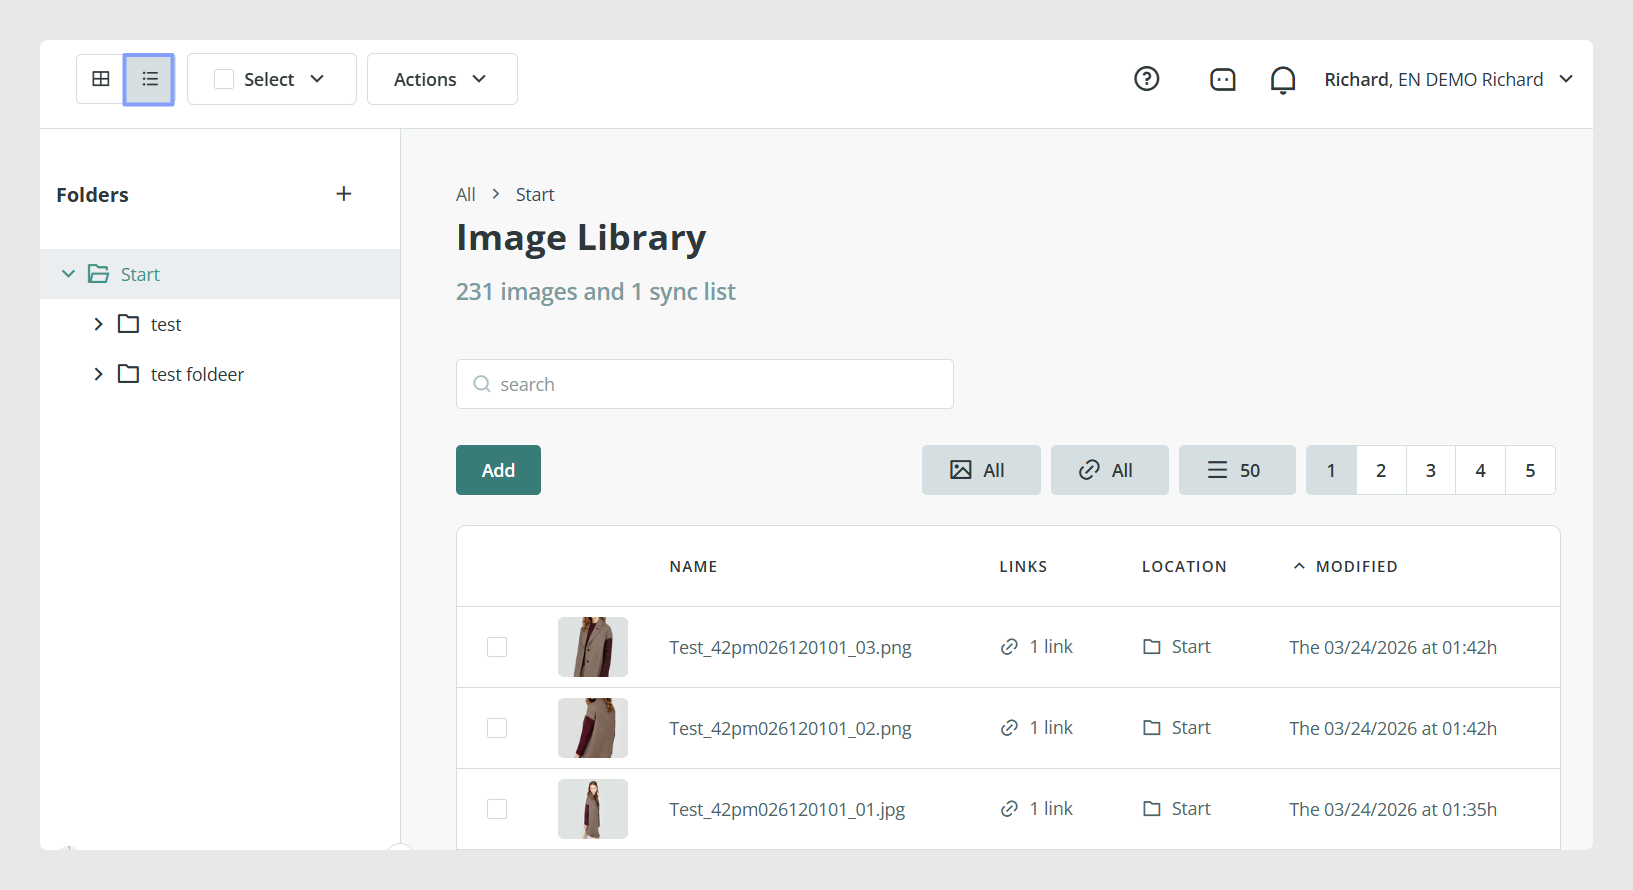
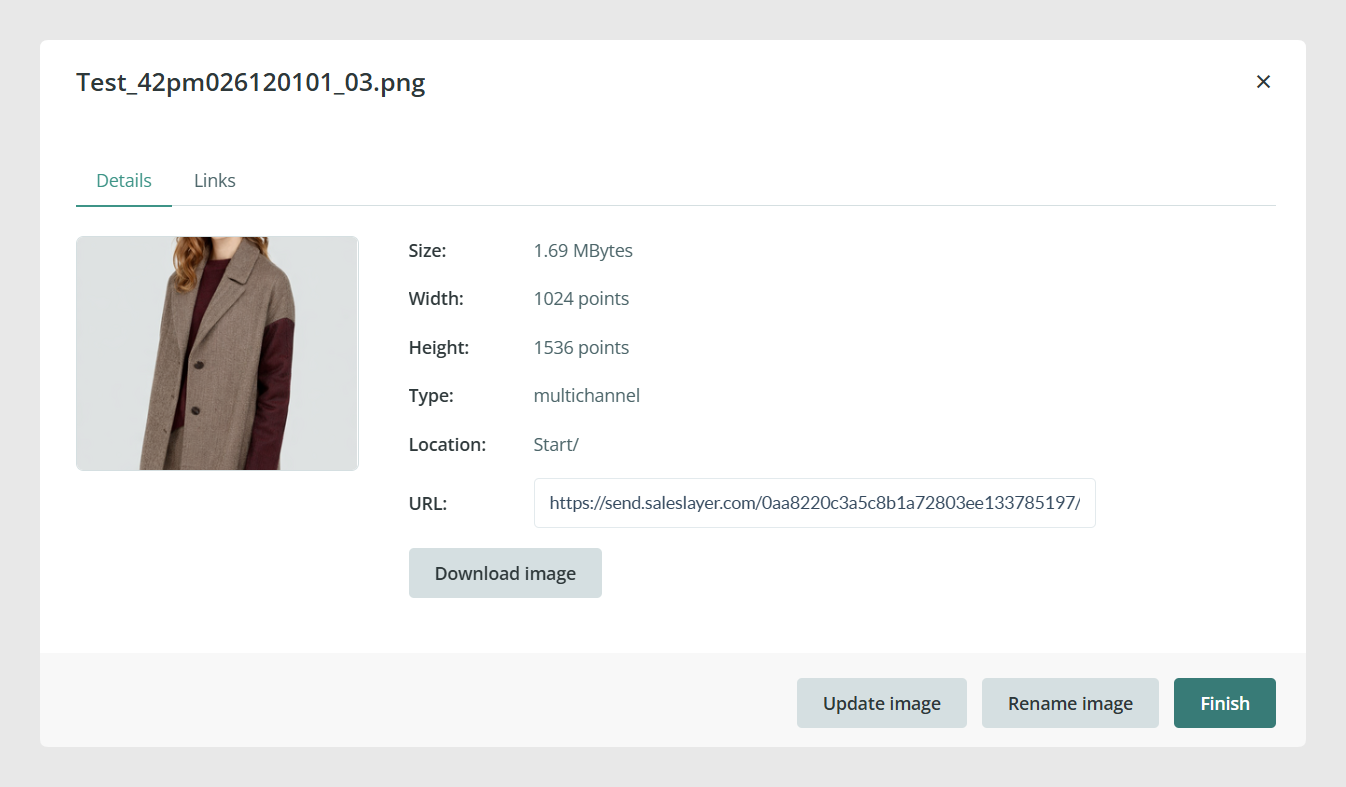
Sales Layer also shows the folder location of each image or file in different places:
In Gallery view, the folder appears below the file name.
In List view, the folder appears in the Location column.
In the item Details tab, the full folder path is displayed with the rest of the file information.
In mosaic view, you can hover over the folder path to see the full location, and click it to open that folder directly.
Folder naming rules
Folder names can be repeated as long as they are not on the same level in the folder tree. Folder names can also include the & character.
It is recommended to avoid unsupported special characters in folder names:
/ ? * : | " < > = , ; ( ) %
Folder limit
Sales Layer allows a maximum of 200 folders. If you try to create a new folder after reaching that limit, the platform shows an error message.
Check how many folders are in use
You can see the number of folders currently in use at the bottom left corner of the page. This helps you check how many folders are still available before creating or importing more.
What happens during imports when the limit is reached
Importing from a ZIP file
If the folder structure inside the ZIP file would exceed the folder limit, the file is not uploaded and Sales Layer shows an error message explaining why.
Importing from an external sync list
If the imported structure would exceed the maximum number of folders, Sales Layer creates folders until the limit is reached. After that, no more folders are created, but the images are uploaded to the Start folder.
If the limit was already reached before the import started, Sales Layer does not create any new folders and uploads the images to the Start folder instead.
Important note for external sync
When the folder limit is reached during an external sync, Sales Layer does not show the same error message that appears in a manual import. Because of this, it is a good idea to check the remaining folder count before using this method.
Common Use Cases
Create a clear folder structure for product images and downloadable files.
Import an existing folder hierarchy from another system.
Export complete folder structures for backup or migration purposes.
Move files into more suitable folders as your library grows.
Use file location details to identify where content is stored quickly.
Best practices
Plan your folder structure before importing a large number of files. Keep folder names simple and consistent, and check the folder count regularly if your team uses many subfolders. If you use automatic syncs, remember that file locations are not updated automatically, so move files manually when a new folder location is needed.
Was this article helpful?
That’s Great!
Thank you for your feedback
Sorry! We couldn't be helpful
Thank you for your feedback
Feedback sent
We appreciate your effort and will try to fix the article