In Sales Layer, an Attribute Set is the form structure that defines which fields a product will use. This is useful when different types of products require different information.
When you create an Attribute Set, the objective is to configure a specific structure for a particular type of product. To change an existing Attribute Set, follow the steps in the article about updating an Attribute Set.
Ways to create an Attribute Set
There are two main ways to create an Attribute Set in Sales Layer:
- Create it during a product import
- Create it directly from the page where Attribute Sets are managed
Use the import method when you are already loading products and want Sales Layer to create the Attribute Set as part of the process. Use the Attribute Sets page when you want to prepare the structure first and assign products afterwards.
Create an Attribute Set during import
To create an Attribute Set while importing products:
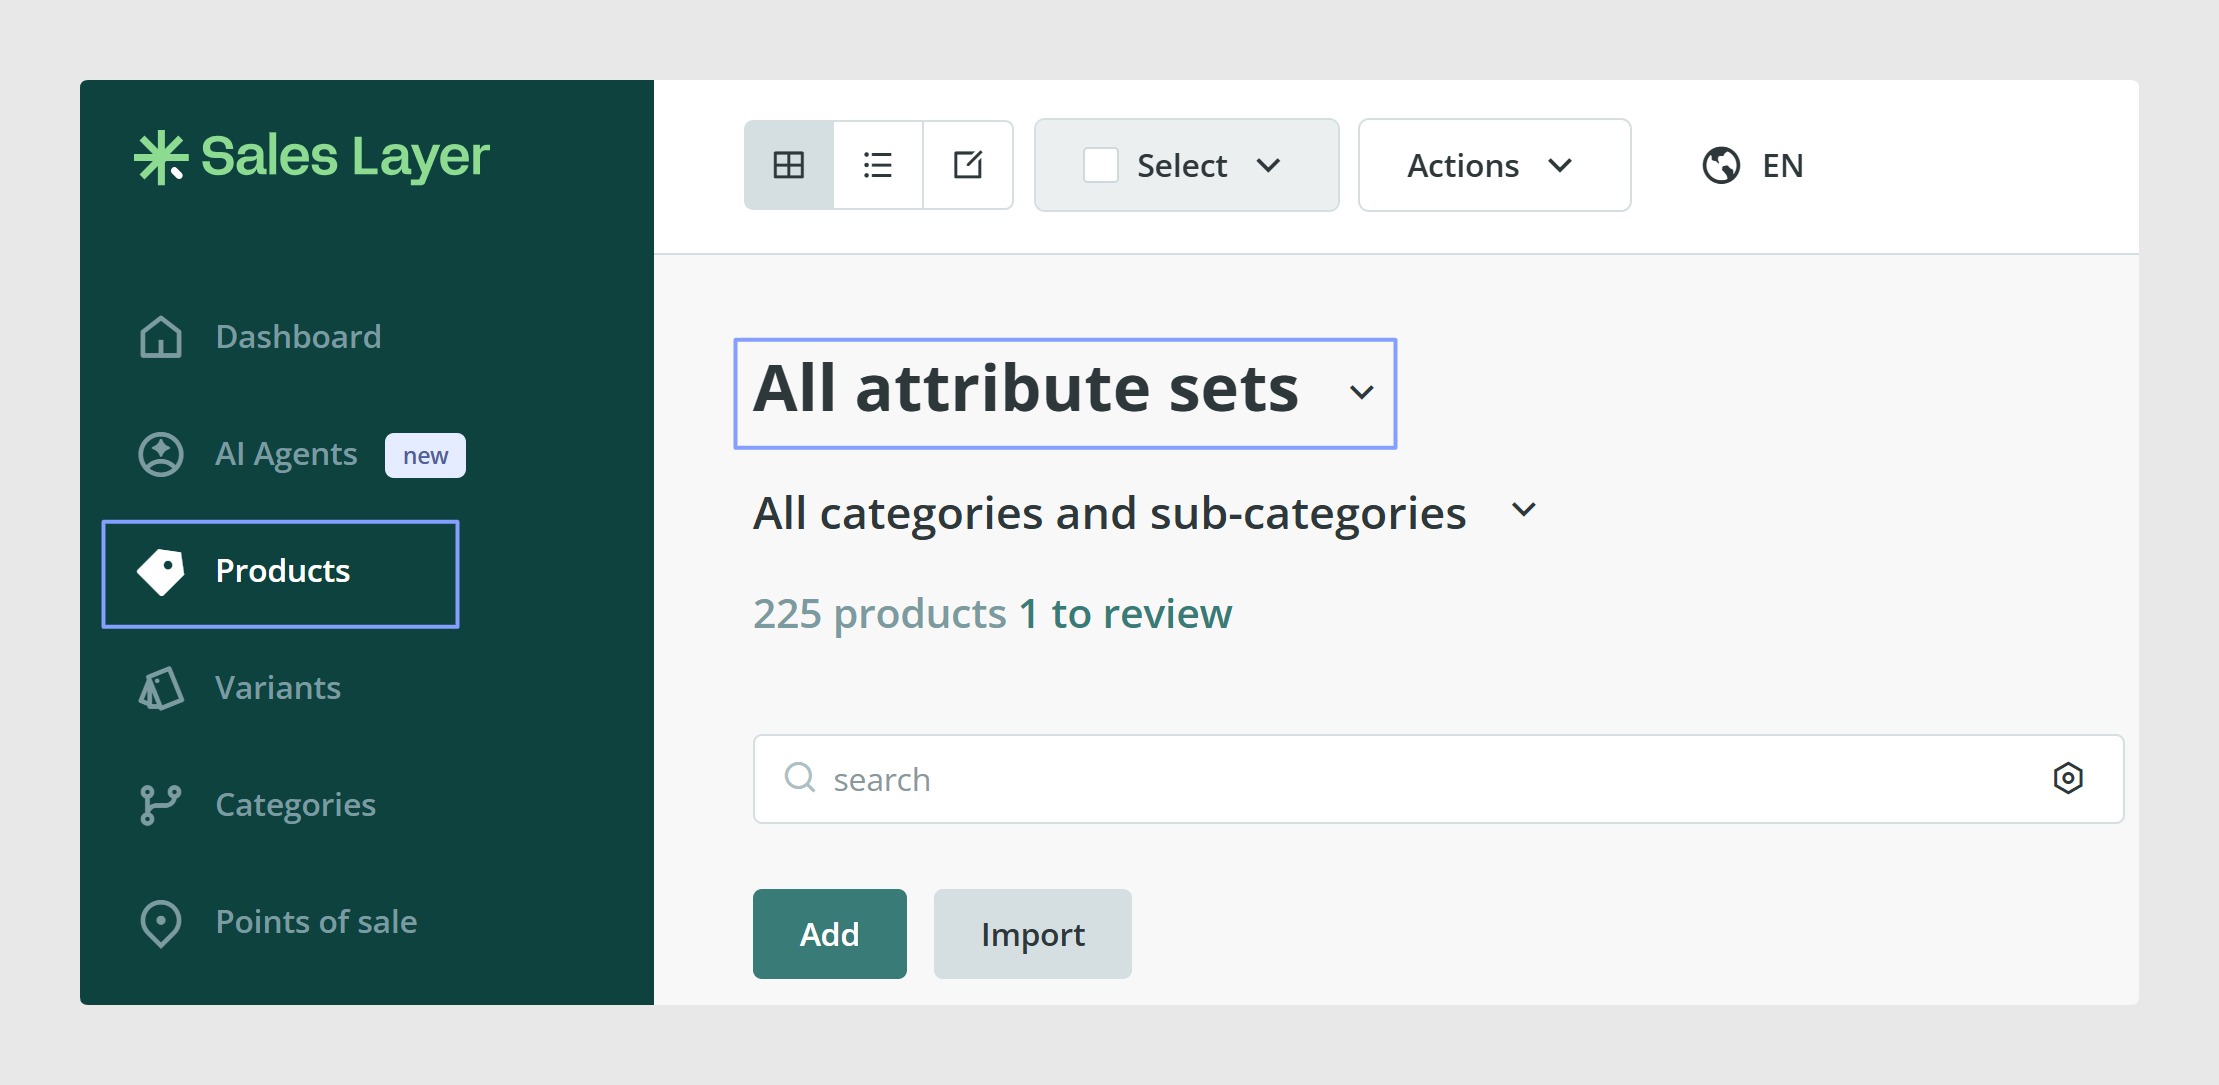
- Go to Products in the left-hand menu.
- Click Import, or open Actions > Import products.
- Choose the import format, such as Excel, CSV, or XML.
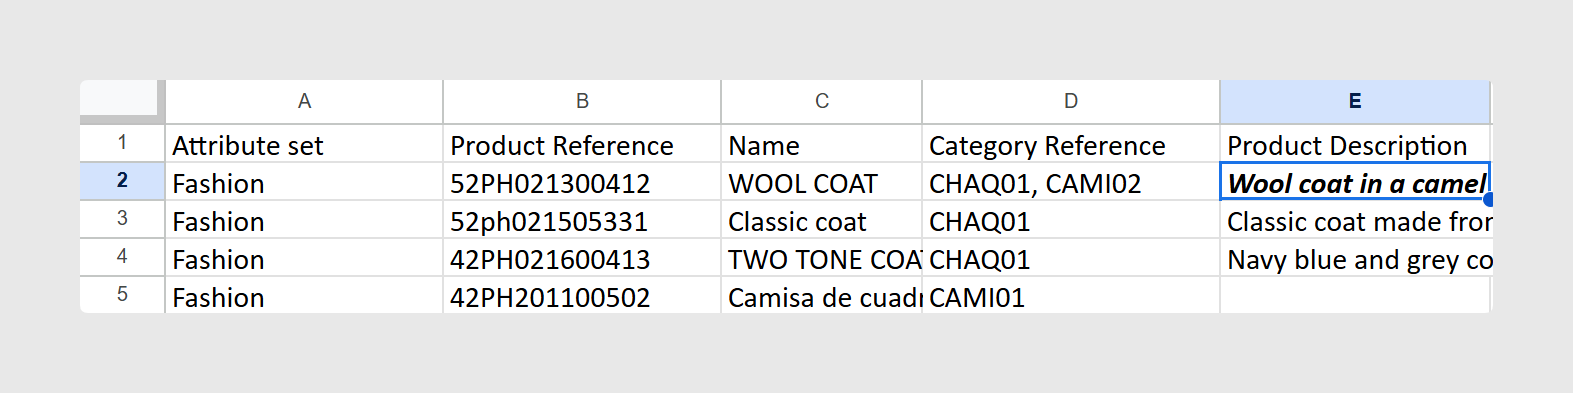
- Make sure your file includes an Attribute Set column.
- Enter the name of the new Attribute Set for the products that should use it.
- Complete the import process.
If the Attribute Set name does not already exist, Sales Layer creates it automatically. If the field is empty, or the column is not included in the file, the products are imported without an Attribute Set.
Create an Attribute Set from the Attribute Sets page
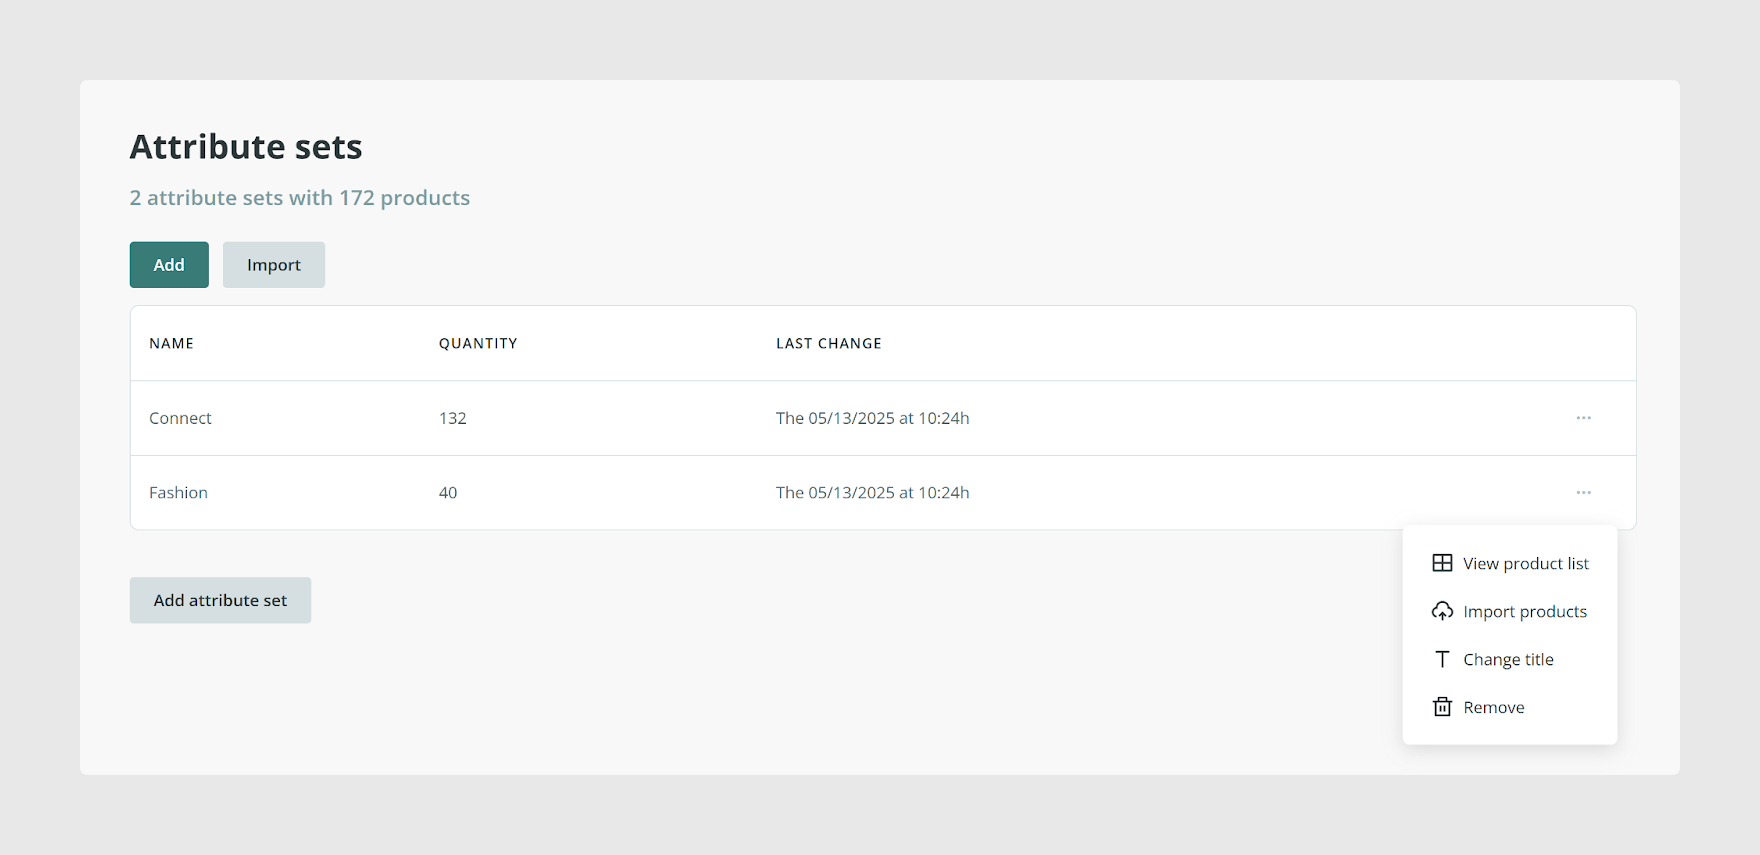
You can also create an Attribute Set directly in Sales Layer from the page where Attribute Sets are managed.
Go to the area where your Attribute Sets are listed and use the Add Attribute Set button to create a new one. This method is useful when you want to build the attribute or field structure before assigning products to it.
Create the Attribute Set structure
Once it has been created, you can start building its form structure.
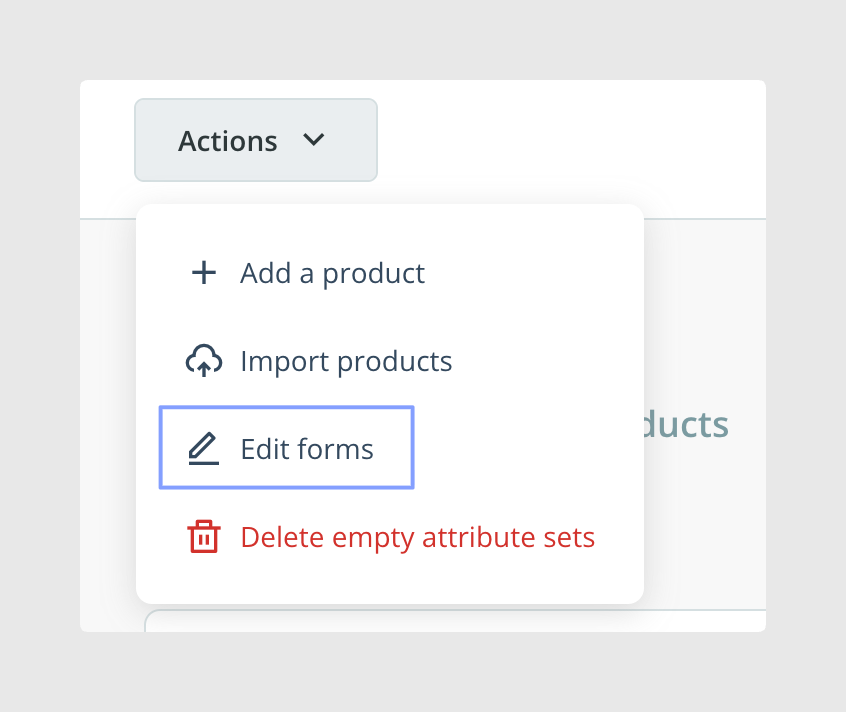
To do this, open the Actions menu and select Edit forms.
Add the first fields
You can then start defining the fields that will form part of the Attribute Set.
You can create new fields or reuse fields that already exist in other Attribute Sets by using the Add new field button at the end of the form.
Reusing existing fields is useful when different product structures share common information, such as brand, materials, dimensions, or logistics data.
Keep in mind: the basic fields always appear by default in the first Basic Information tab and cannot be moved to another tab. These fields are Product reference, Name, Category reference, Attribute Set, Product description, Tags, and Image.
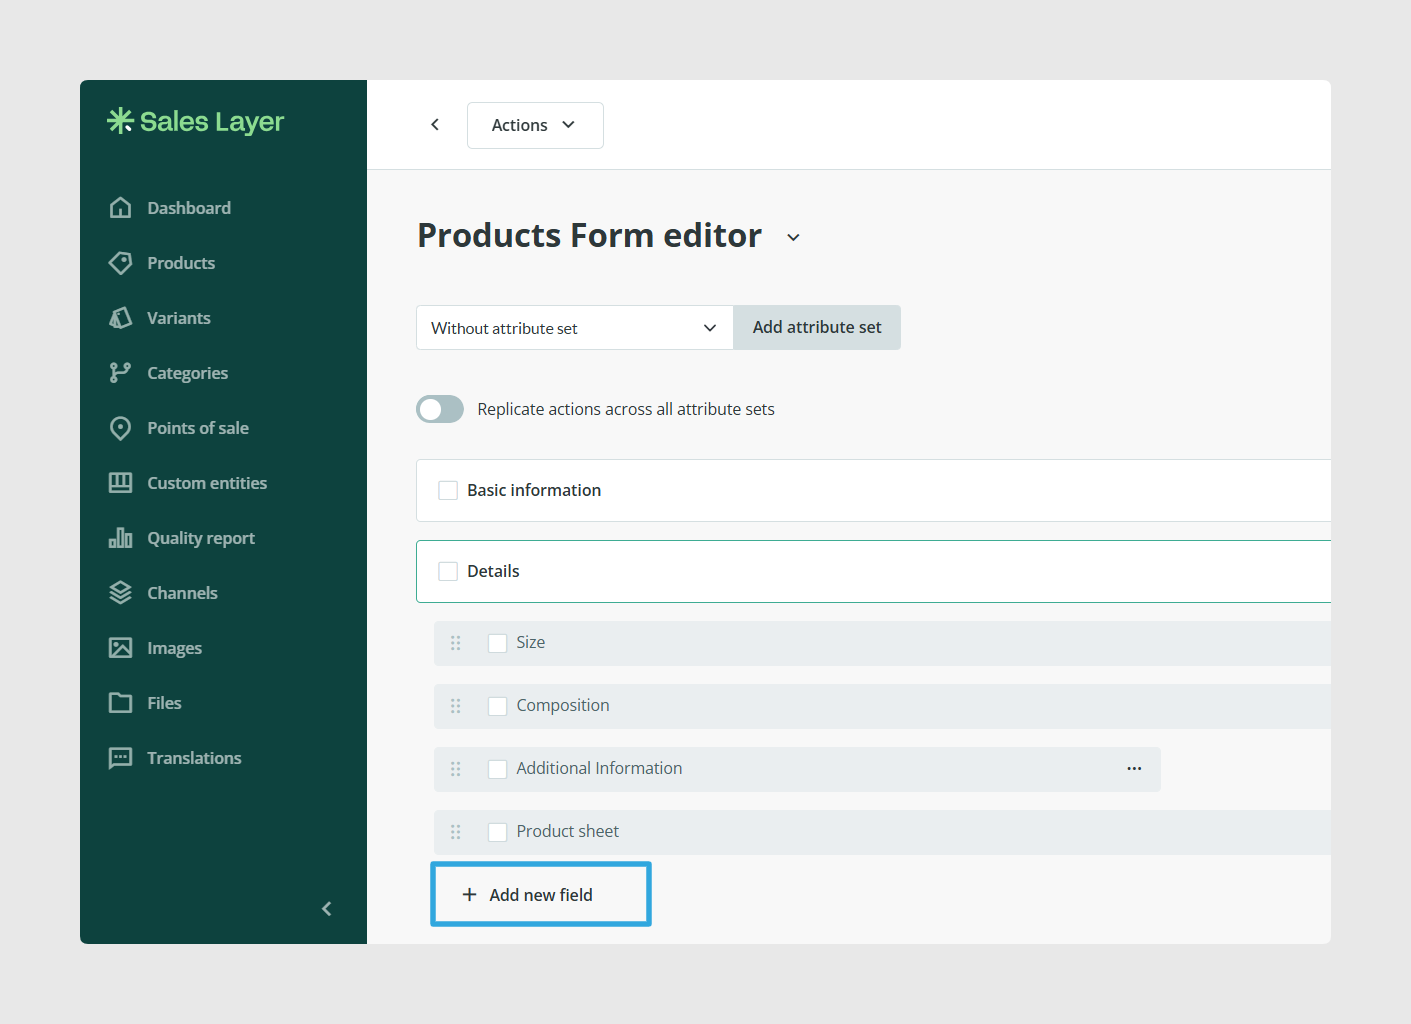
Organize the form with tabs and sections
To make the attributes easier to view, you can create tabs that group related fields and sections within a tab that separate the information more clearly.
To add a new tab to the form, use one of these options:
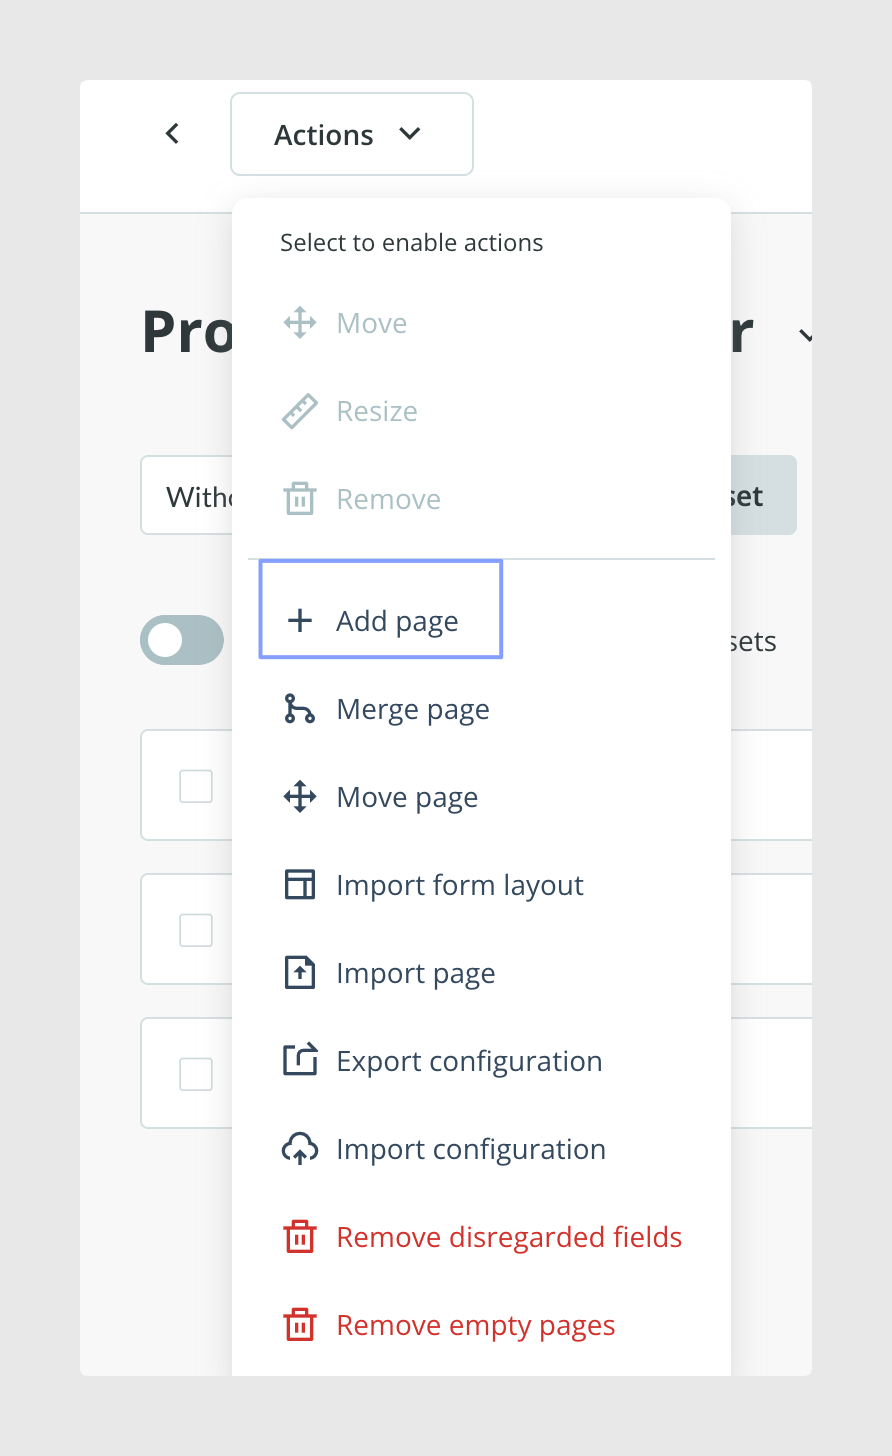
- From the form editor, open the Actions menu and select Add page.
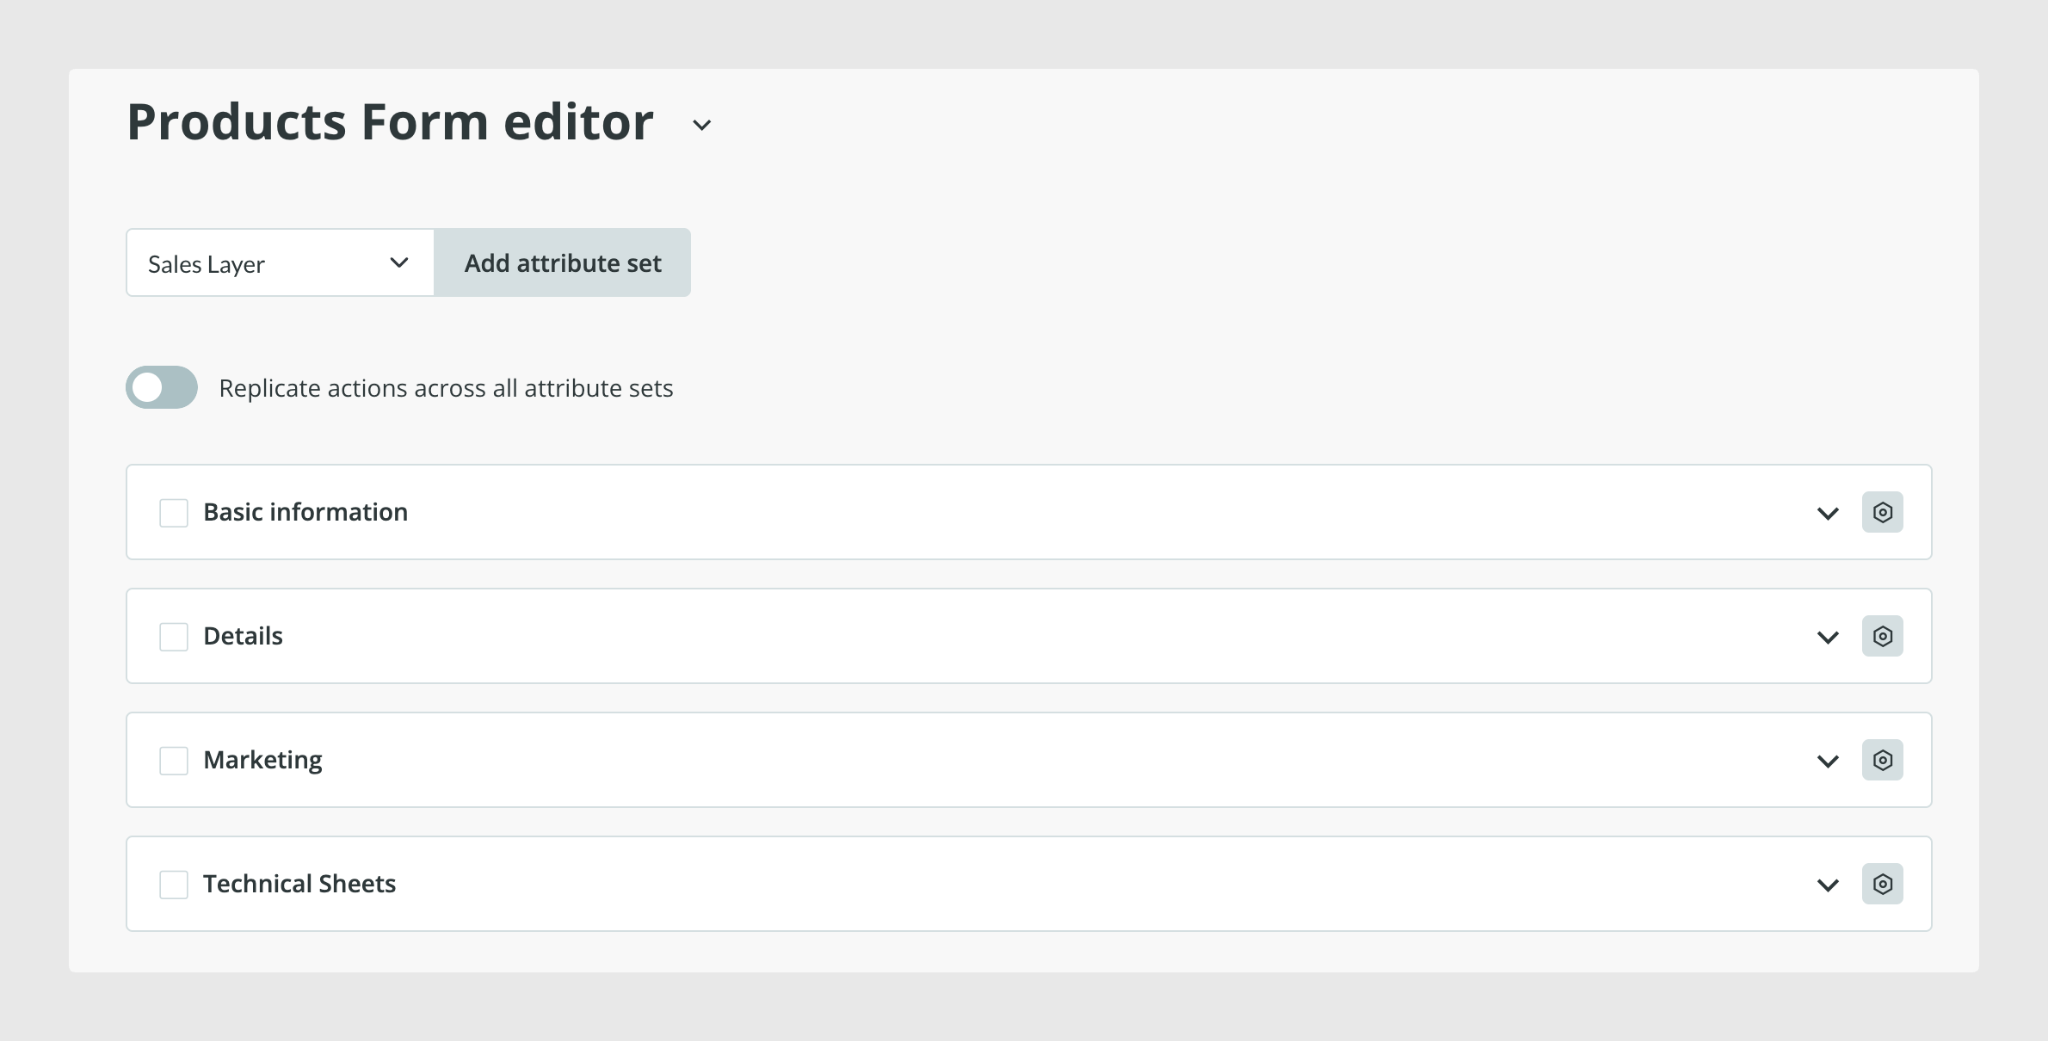
The tabs appear one below another in the editor, and you can add the required fields inside each tab:
- Alternatively, open a product that uses the Attribute Set you want to edit and select Redesign form from the Actions menu.
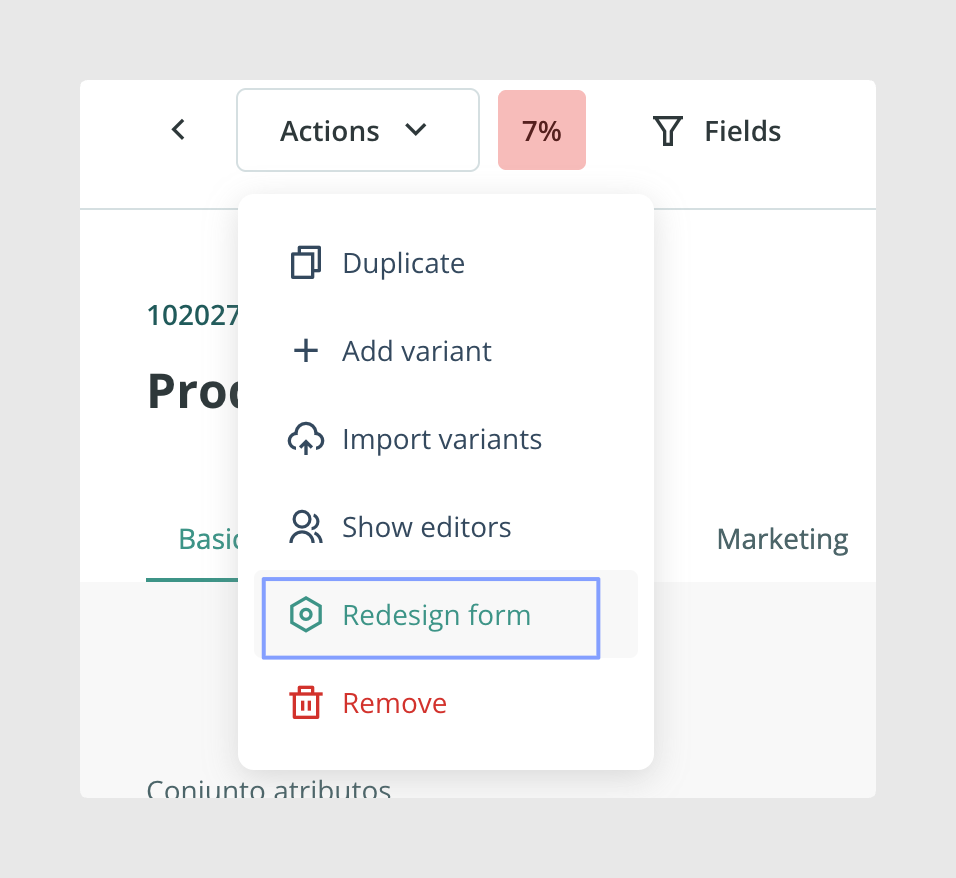
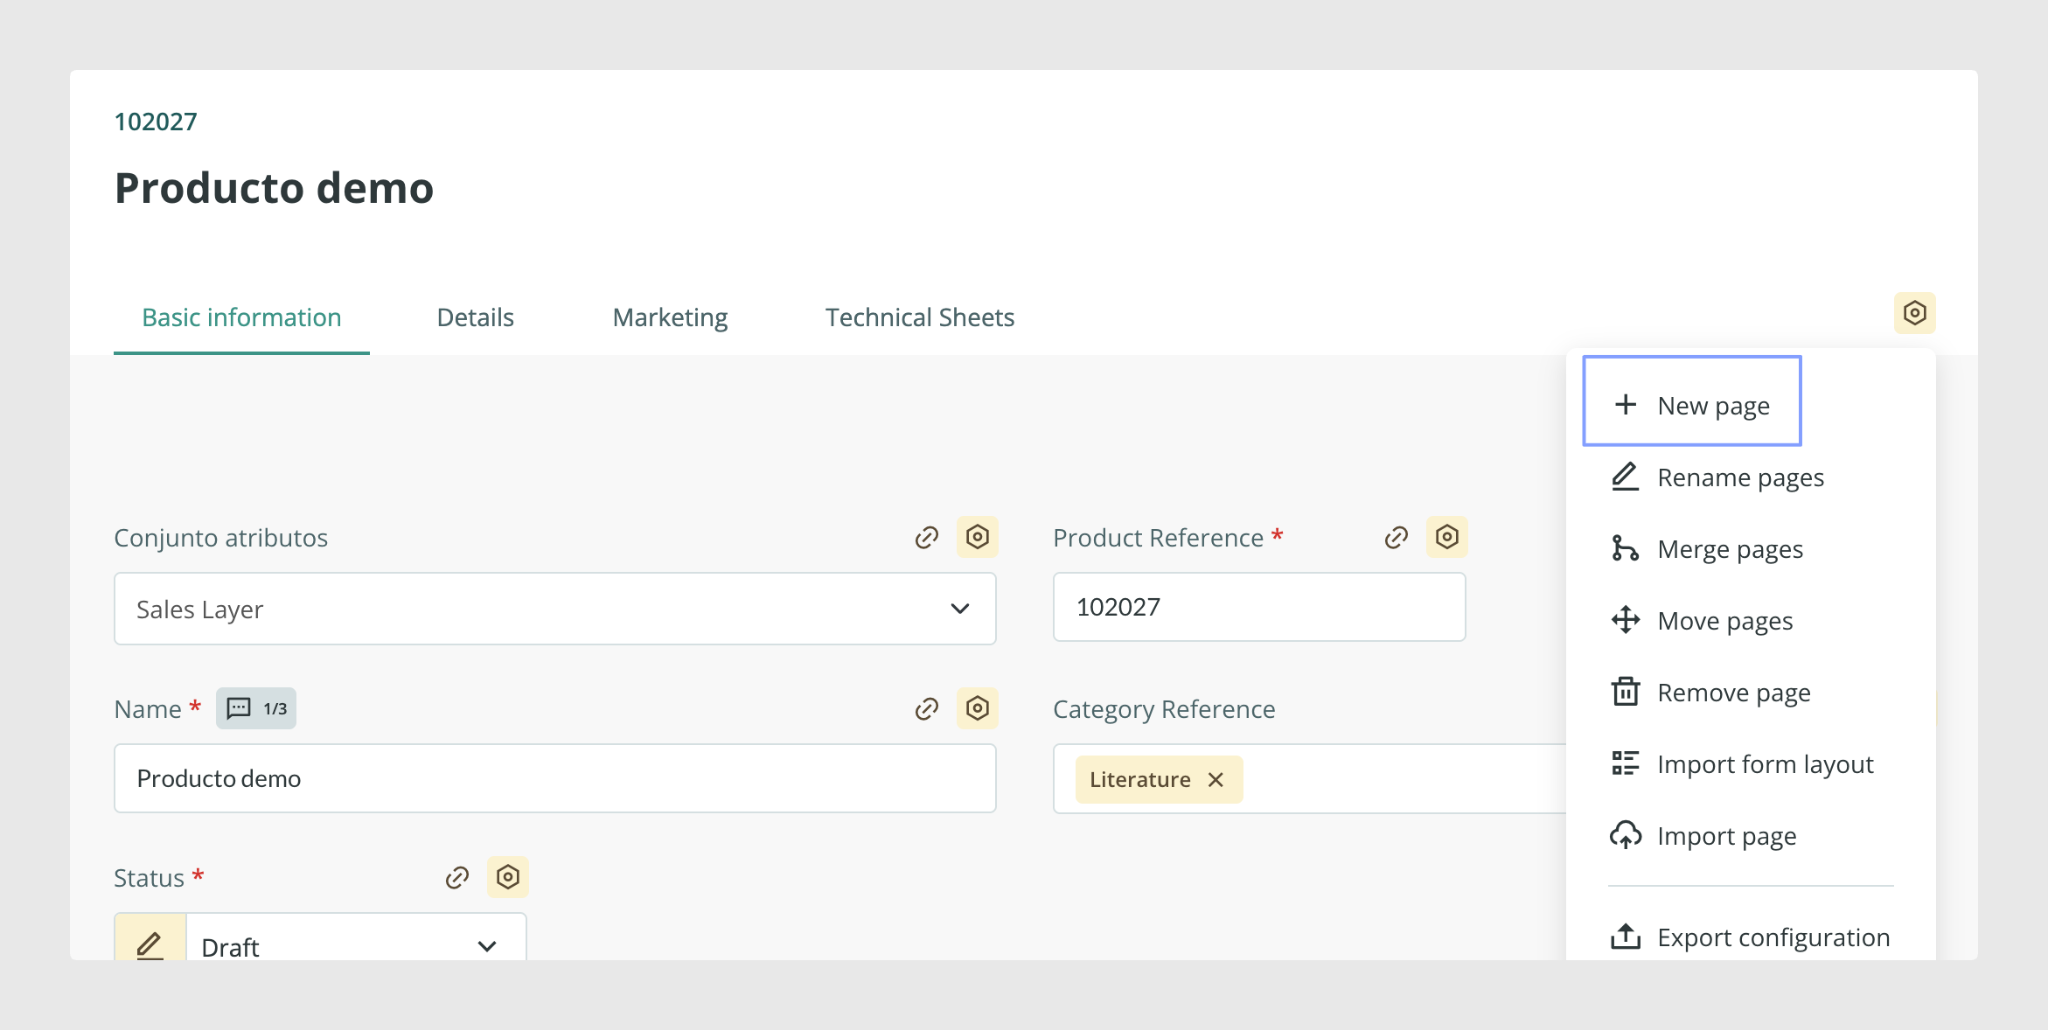
From there, click the configuration icon on the right to open the menu for adding new tabs.
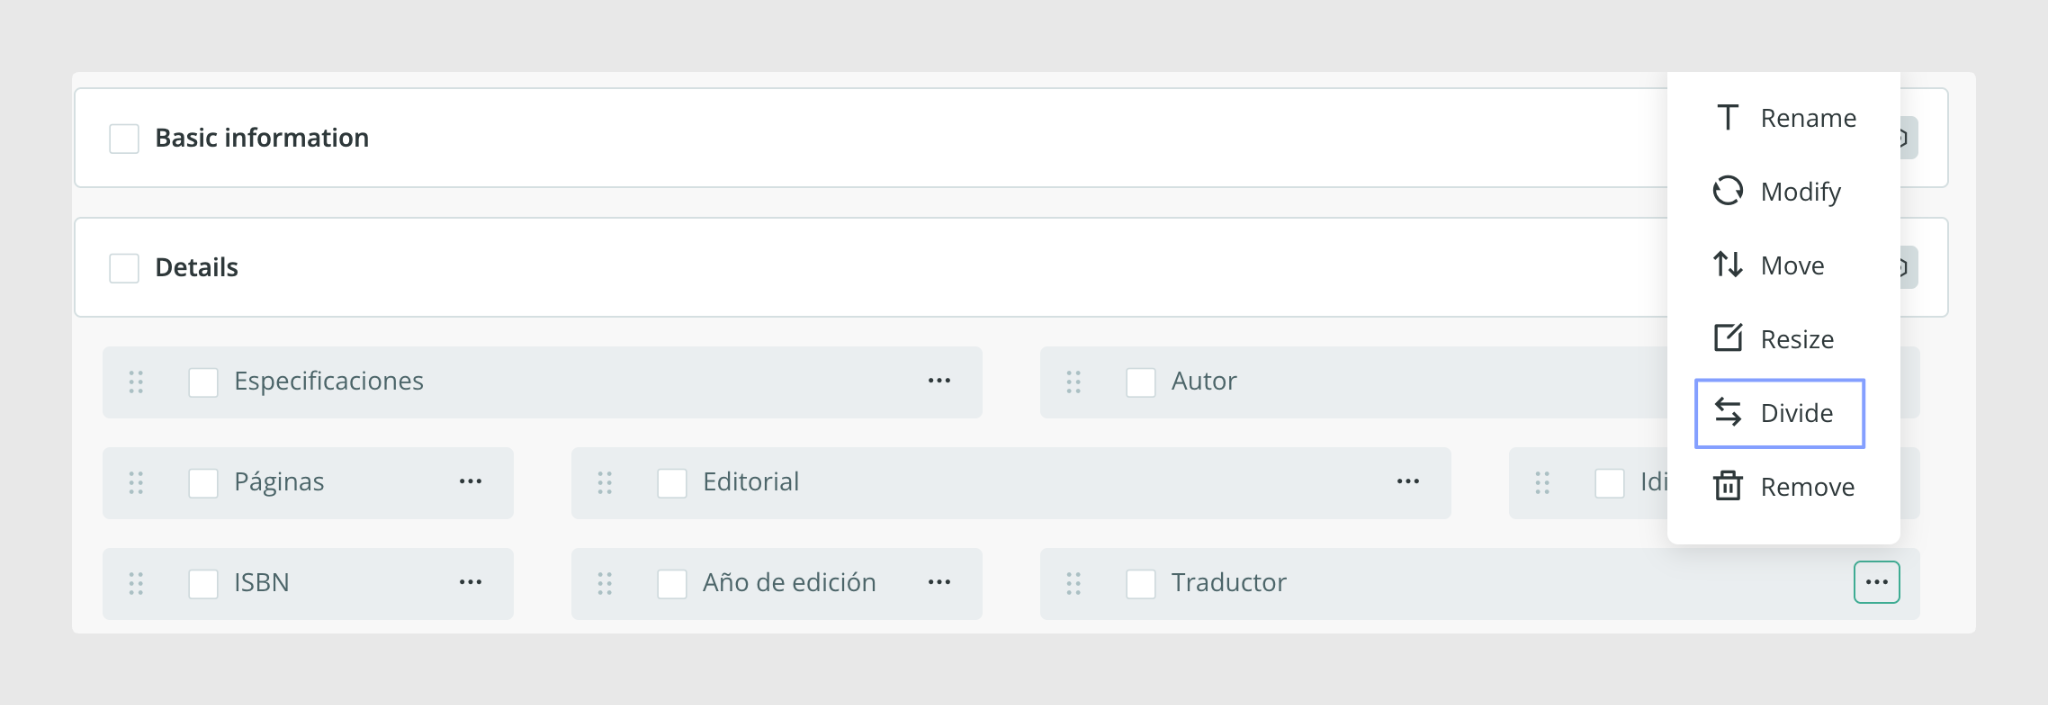
To create sections within a tab and separate attributes with headings, click the three-dot menu on the field above which you want to create a heading, then select Divide.
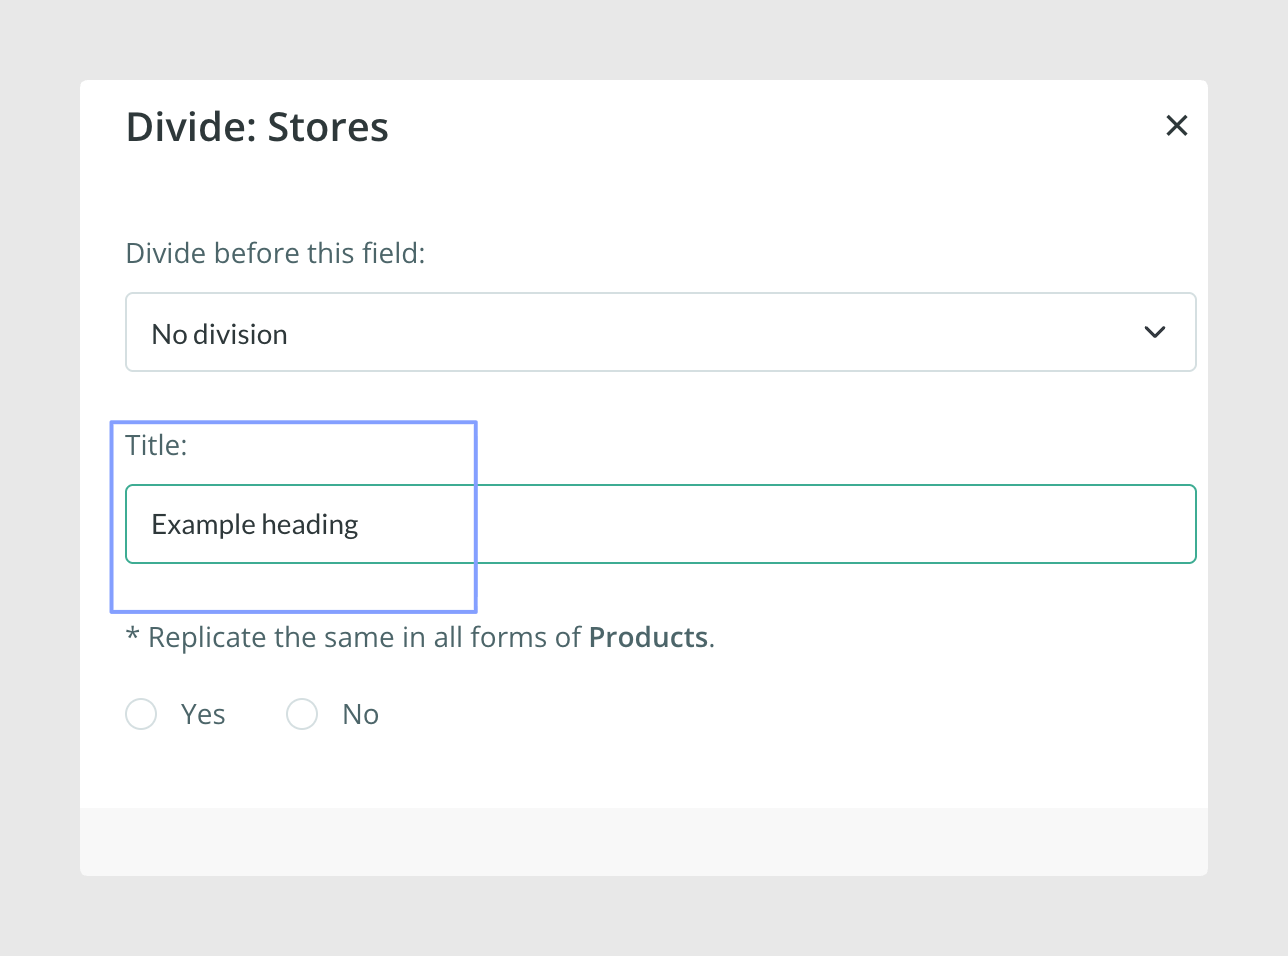
Enter a title and save the changes.
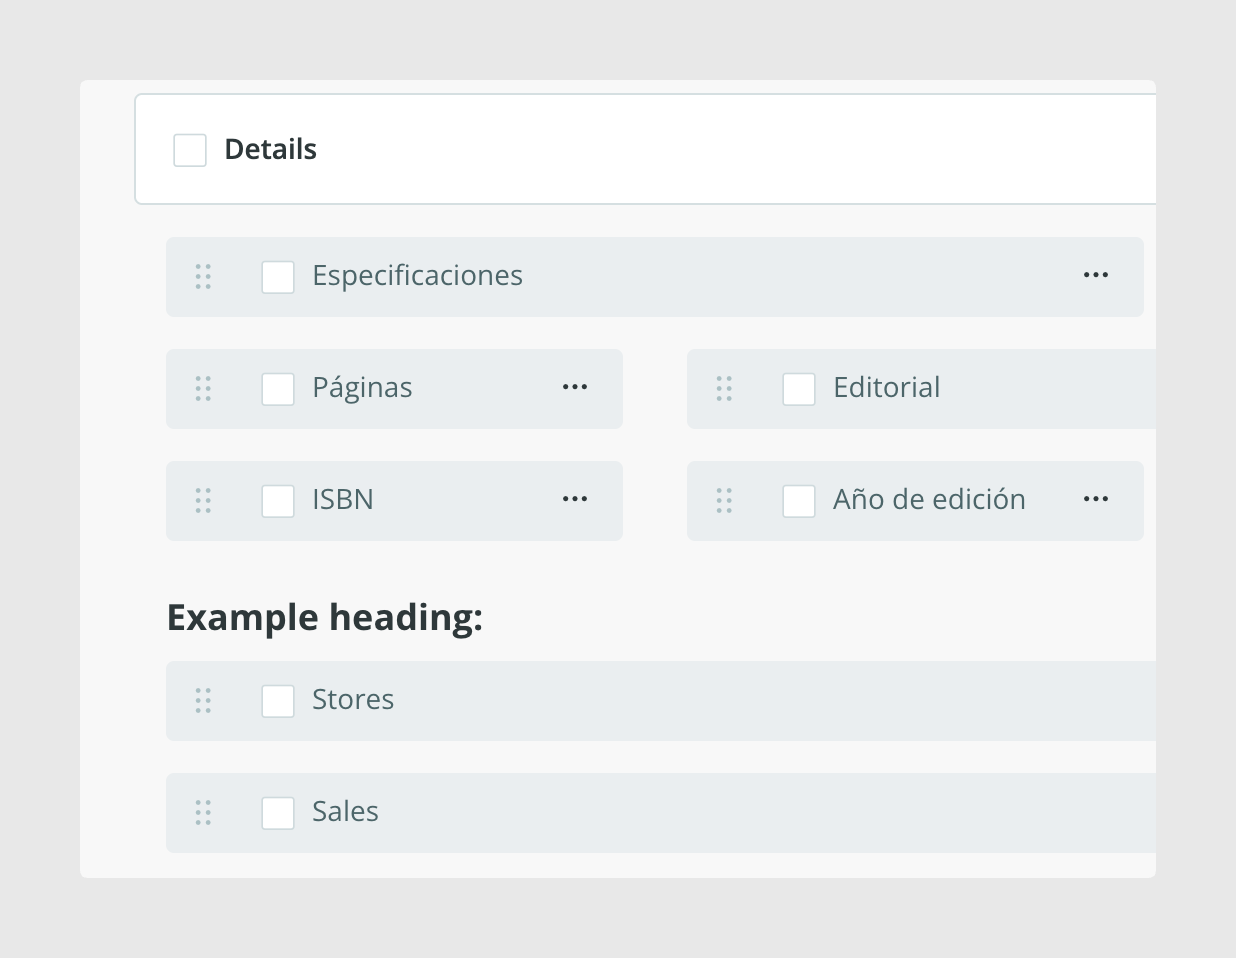
Once created, the section appears inside the tab as shown below. If the form contains many fields, you can add several sections to the same tab to make the structure easier to review.
For the other adjustments available in the form, such as moving fields between tabs or renaming and merging pages, see the article about updating an Attribute Set.
Assign products to the new Attribute Set
After creating one or more Attribute Sets, you can assign products to each one manually or through an import by entering the corresponding Attribute Set for each product in the Attribute Set column.
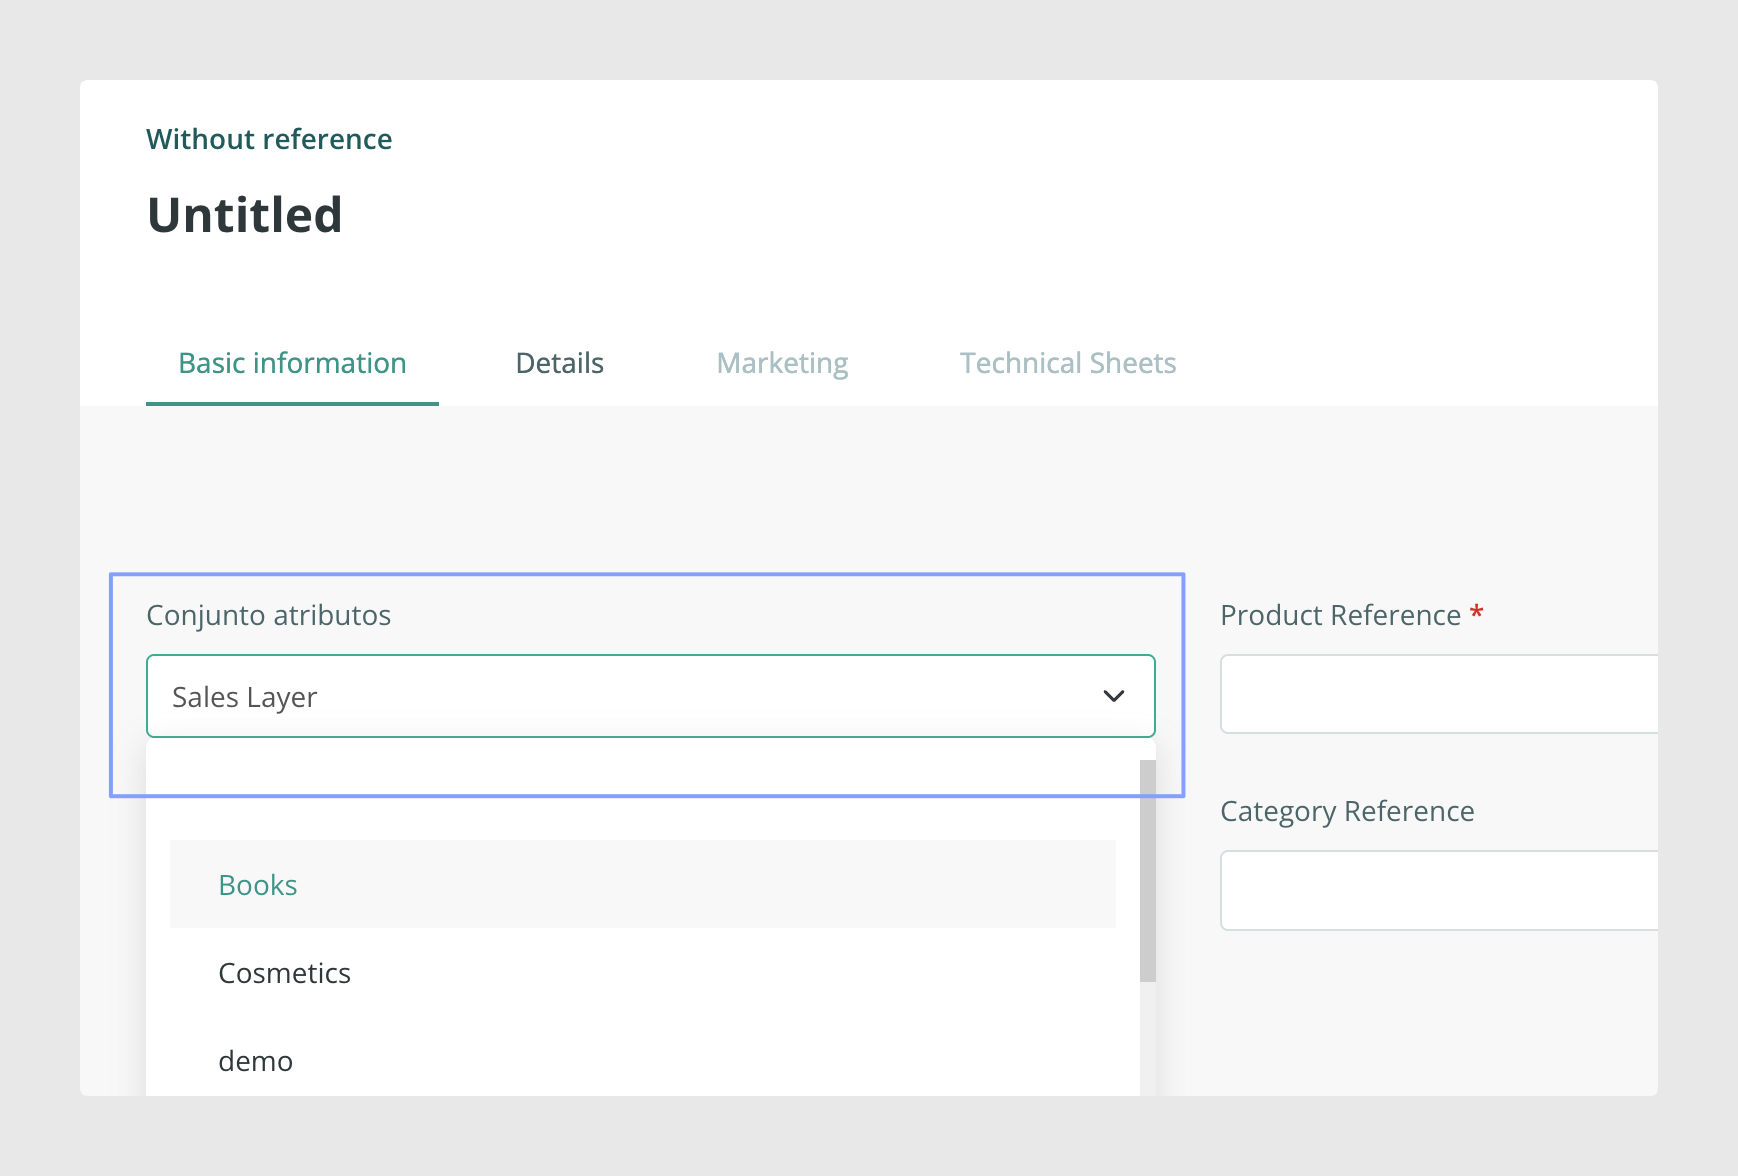
When creating products manually in an account that already has Attribute Sets, select the appropriate Attribute Set from the dropdown and complete the fields in its template:
Think about variants when creating the structure
Attribute Sets apply to products and their variants, but not to categories.
Variants inherit the Attribute Set of their parent product, so when creating a new structure, consider whether the same form will also work for the related variants.
Export and reuse the structure
To reuse the new Attribute Set in another setup, Sales Layer lets you export all or part of it to an XLY file.
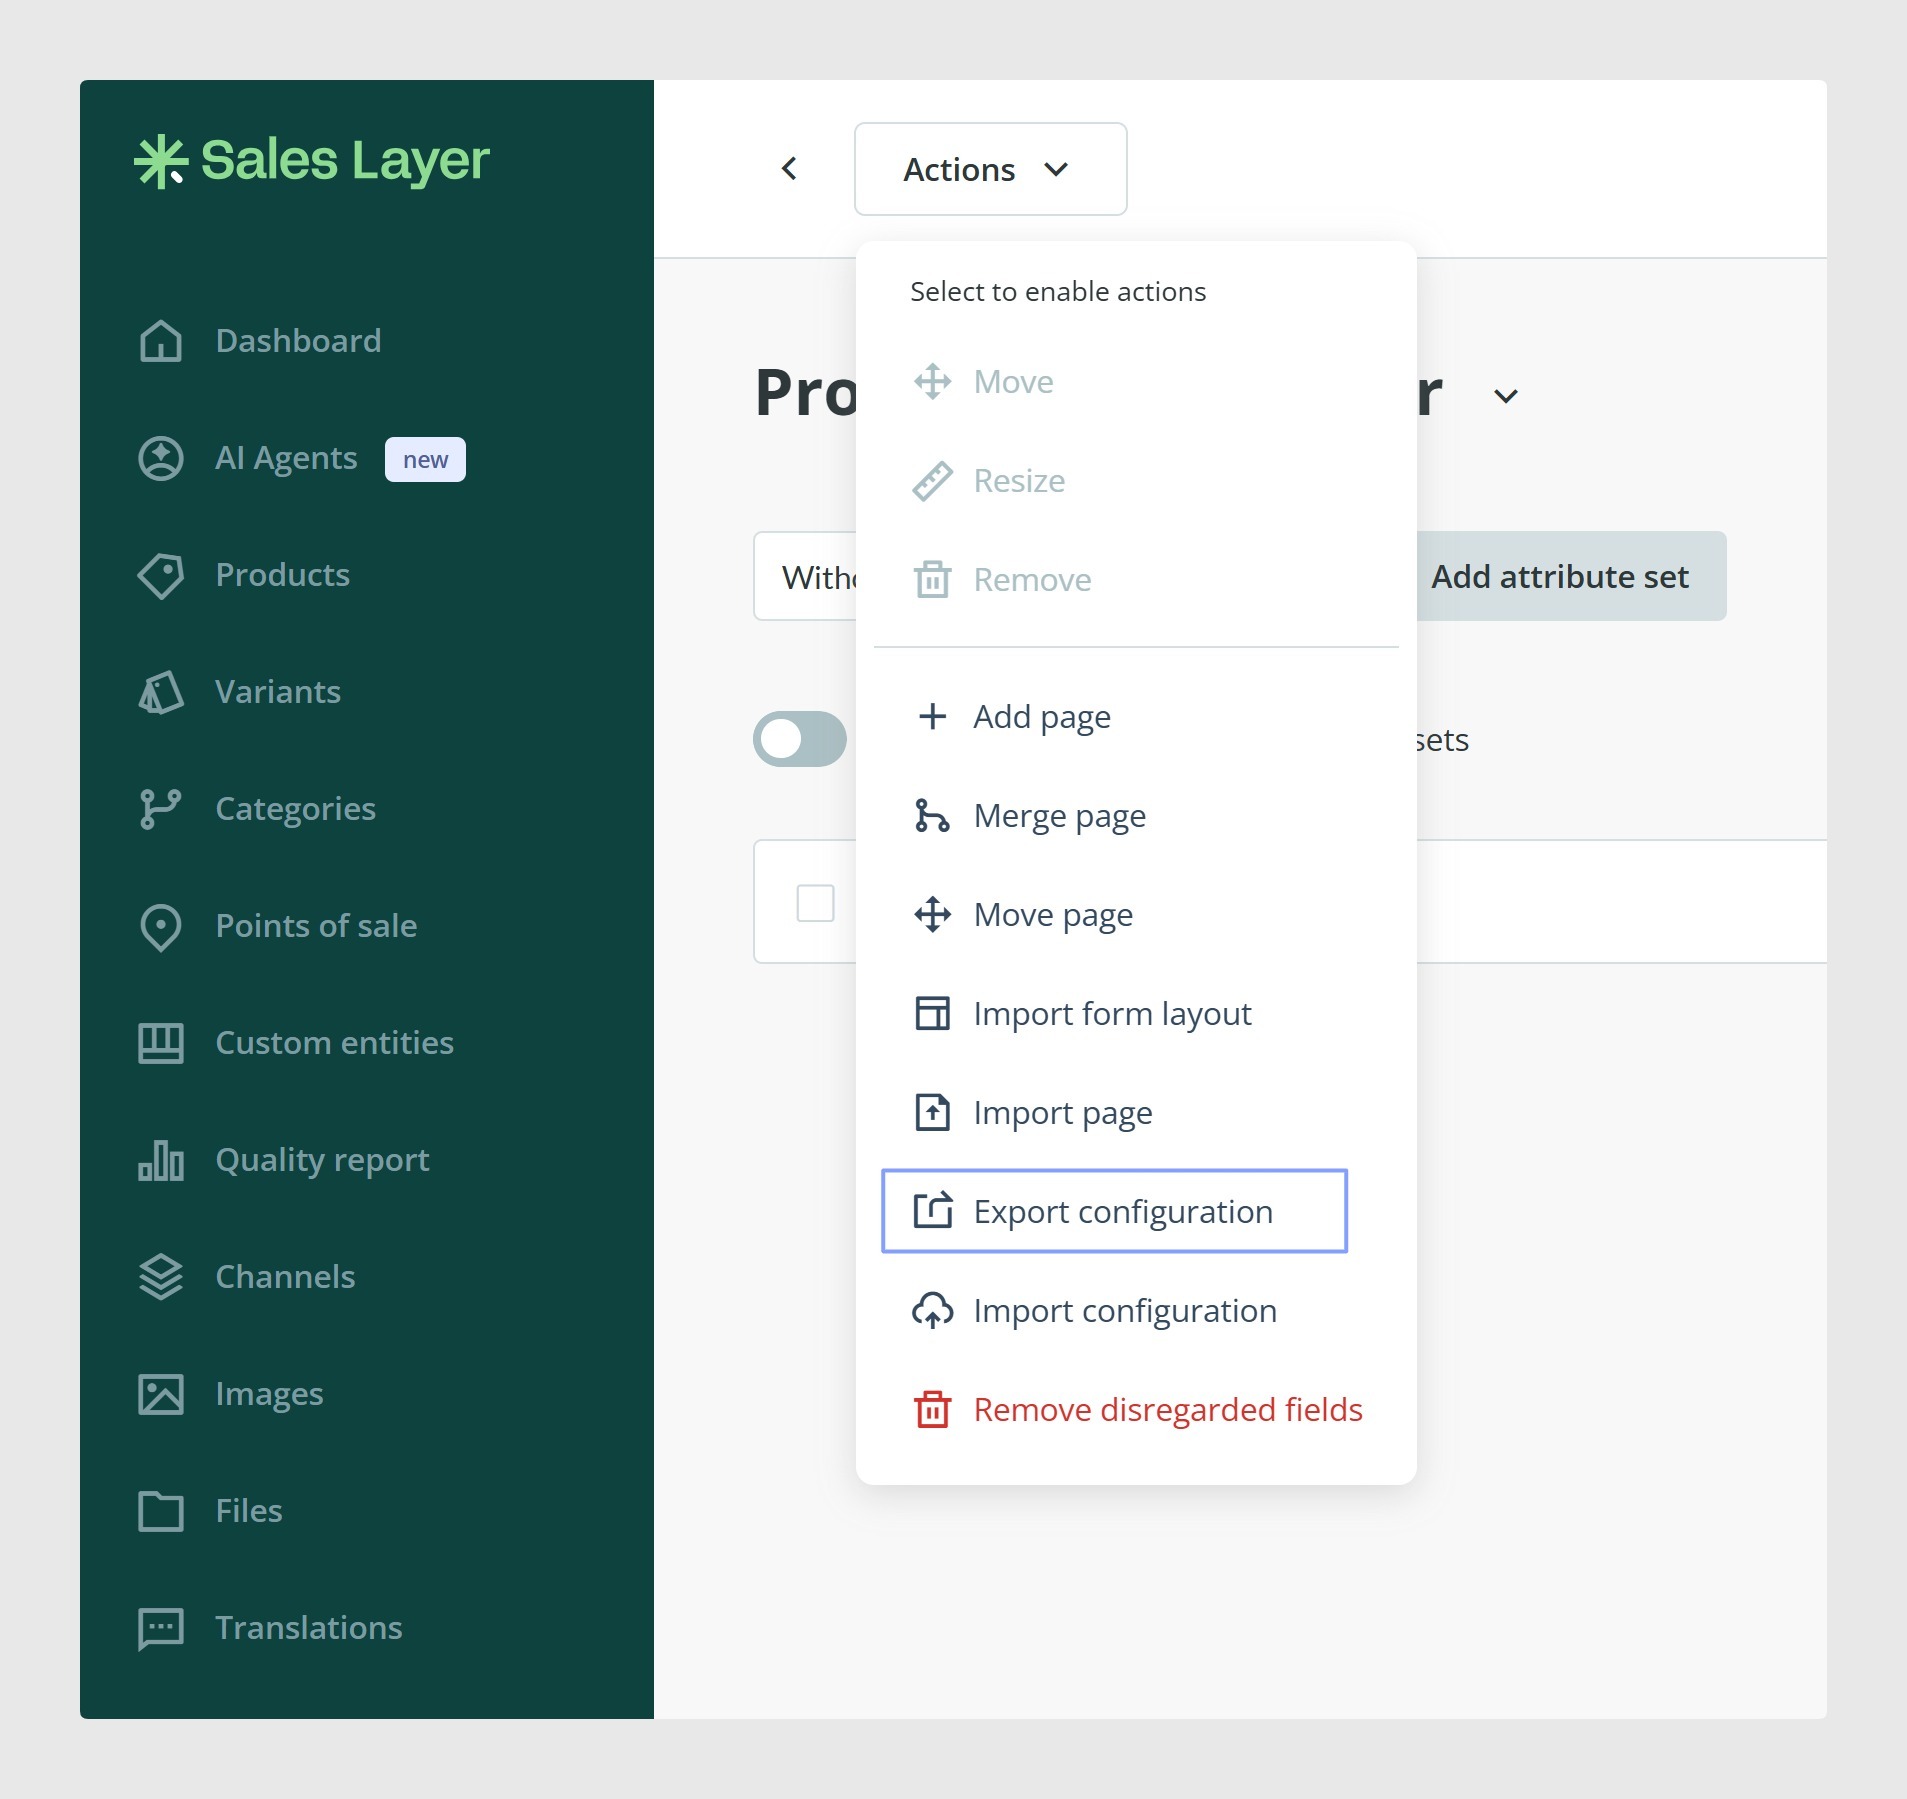
To export the configuration, go to Edit forms > Actions > Export configuration.
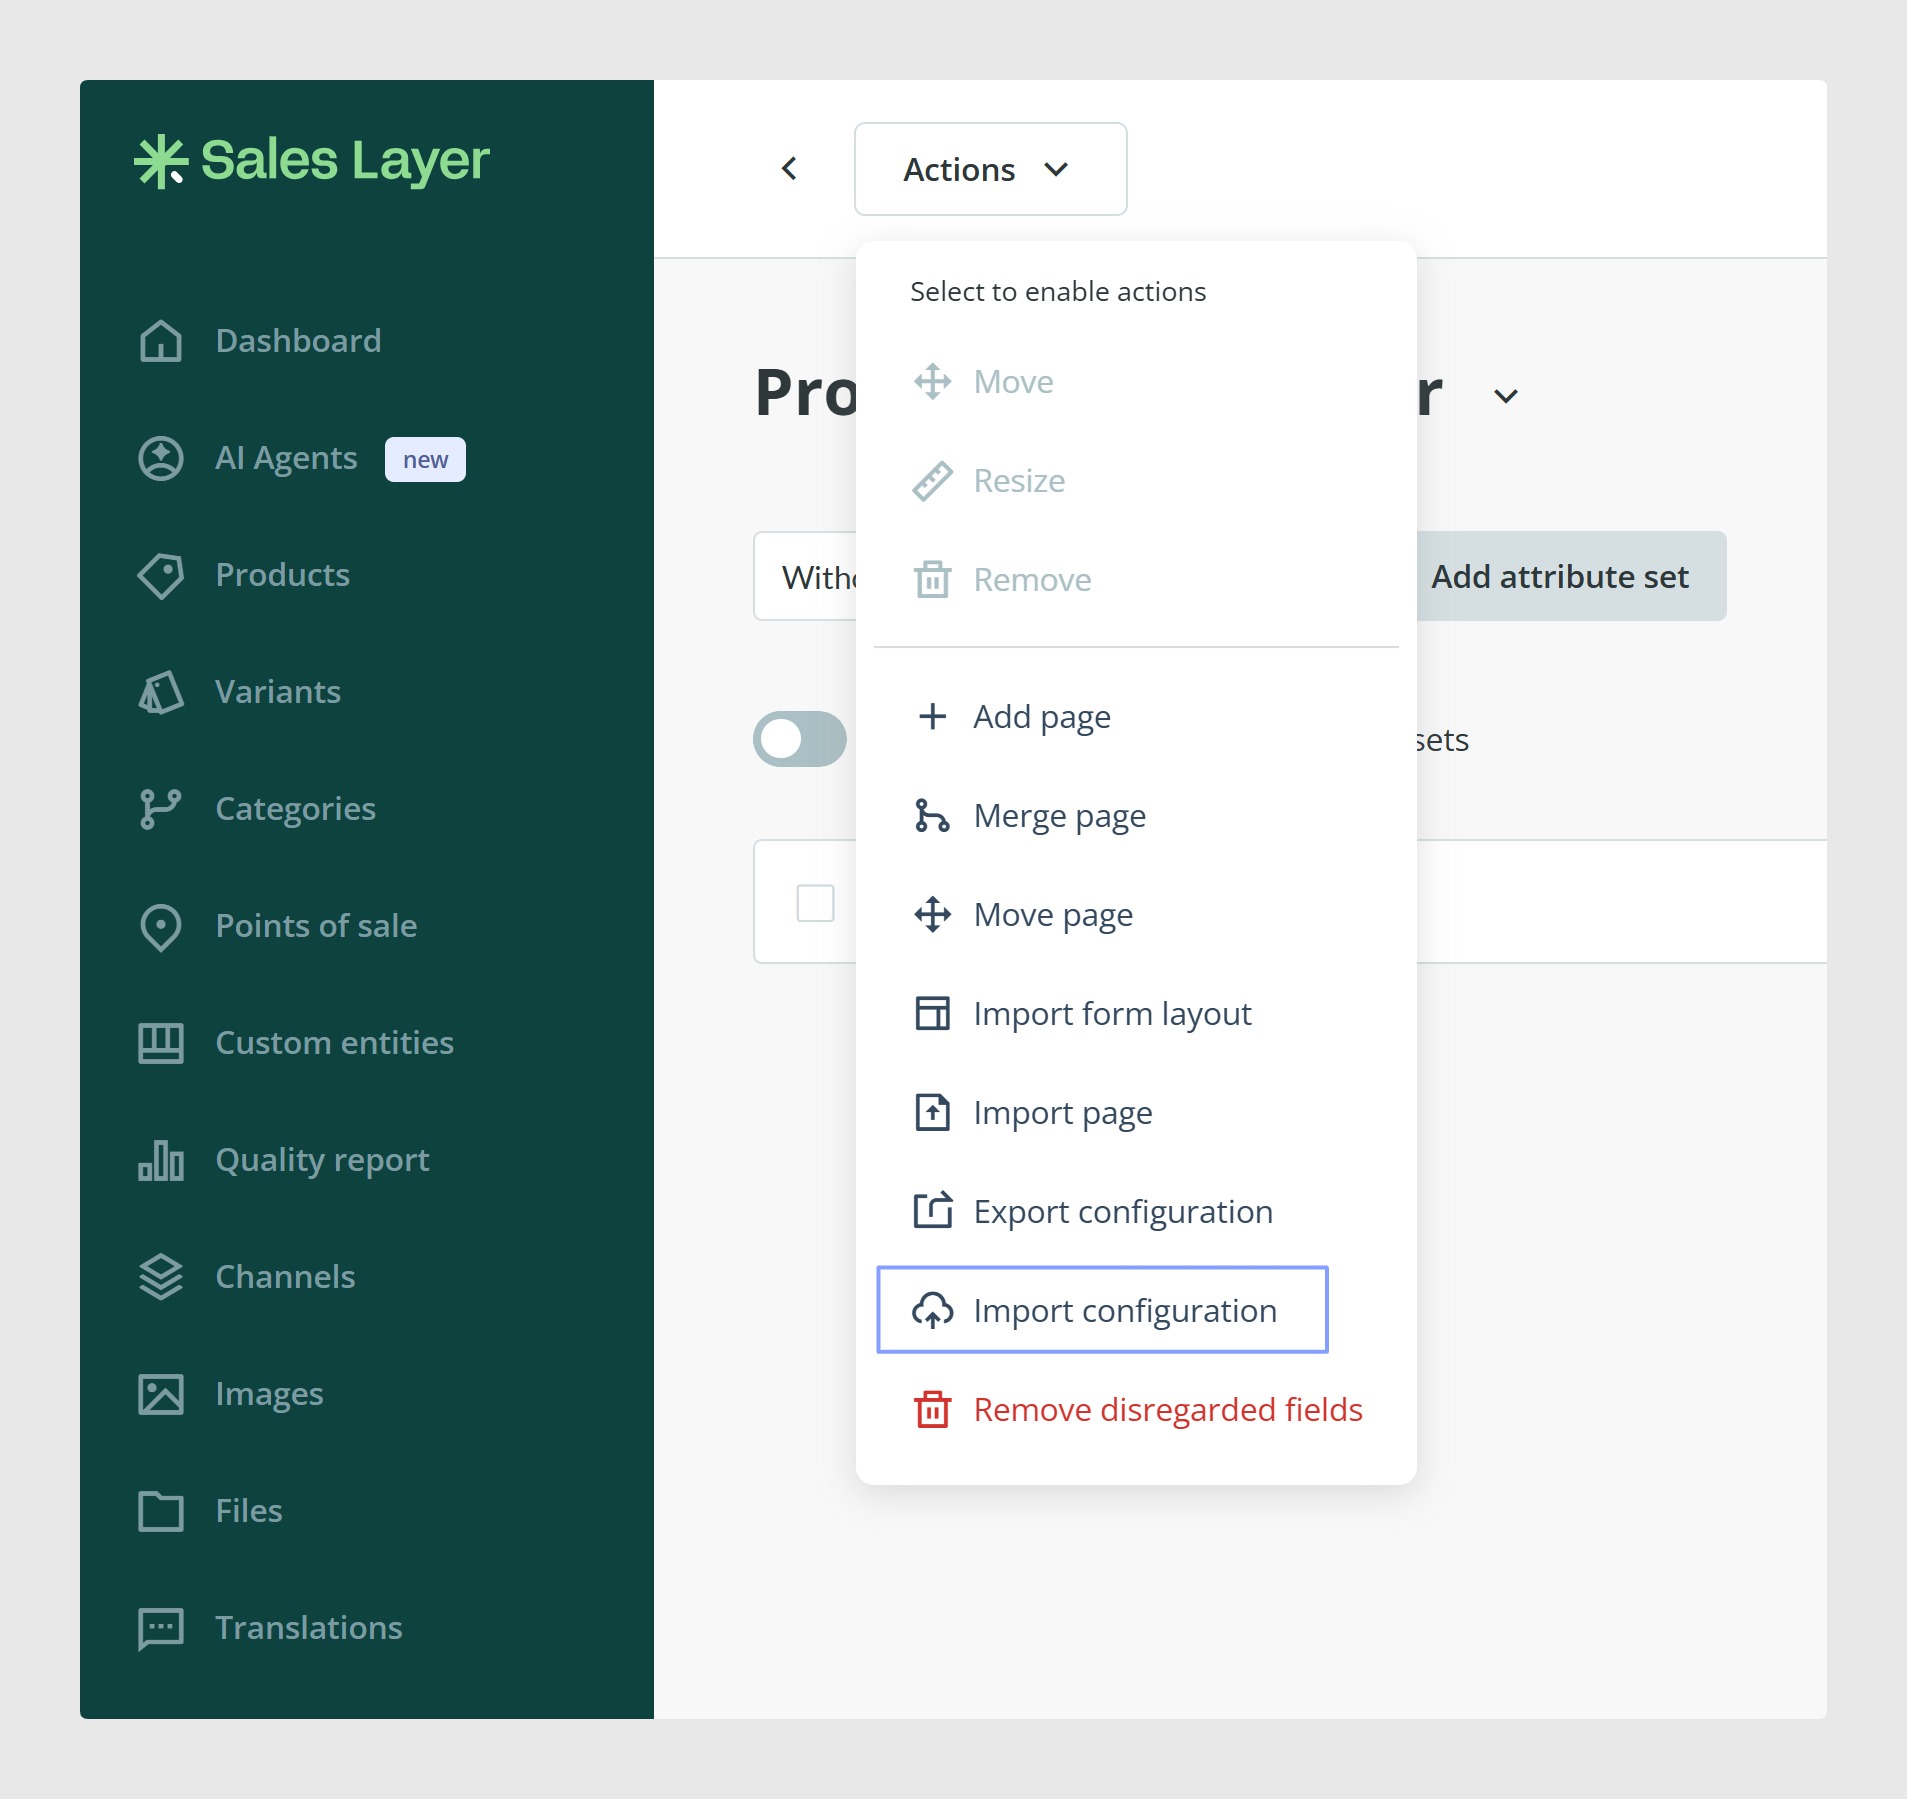
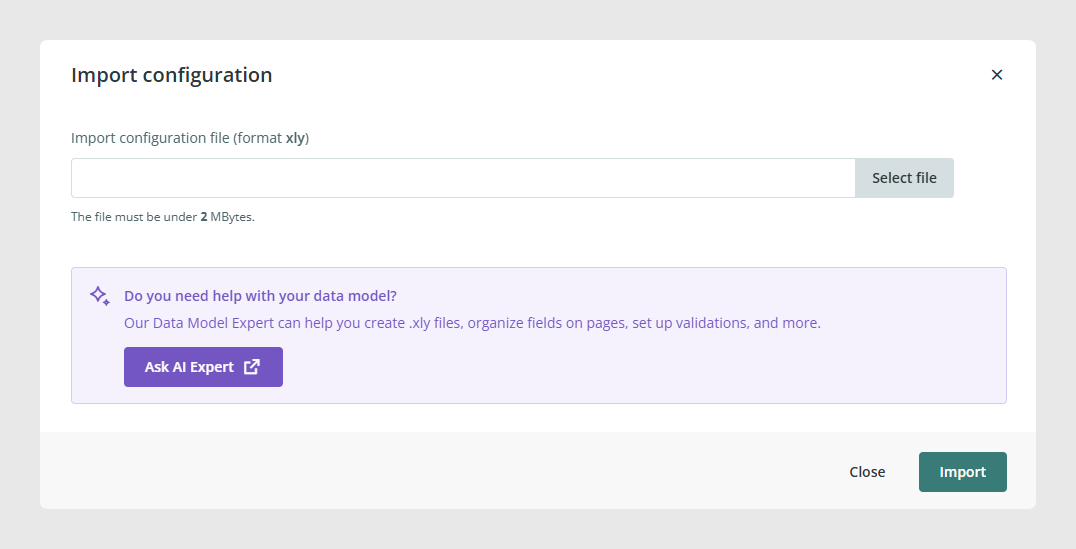
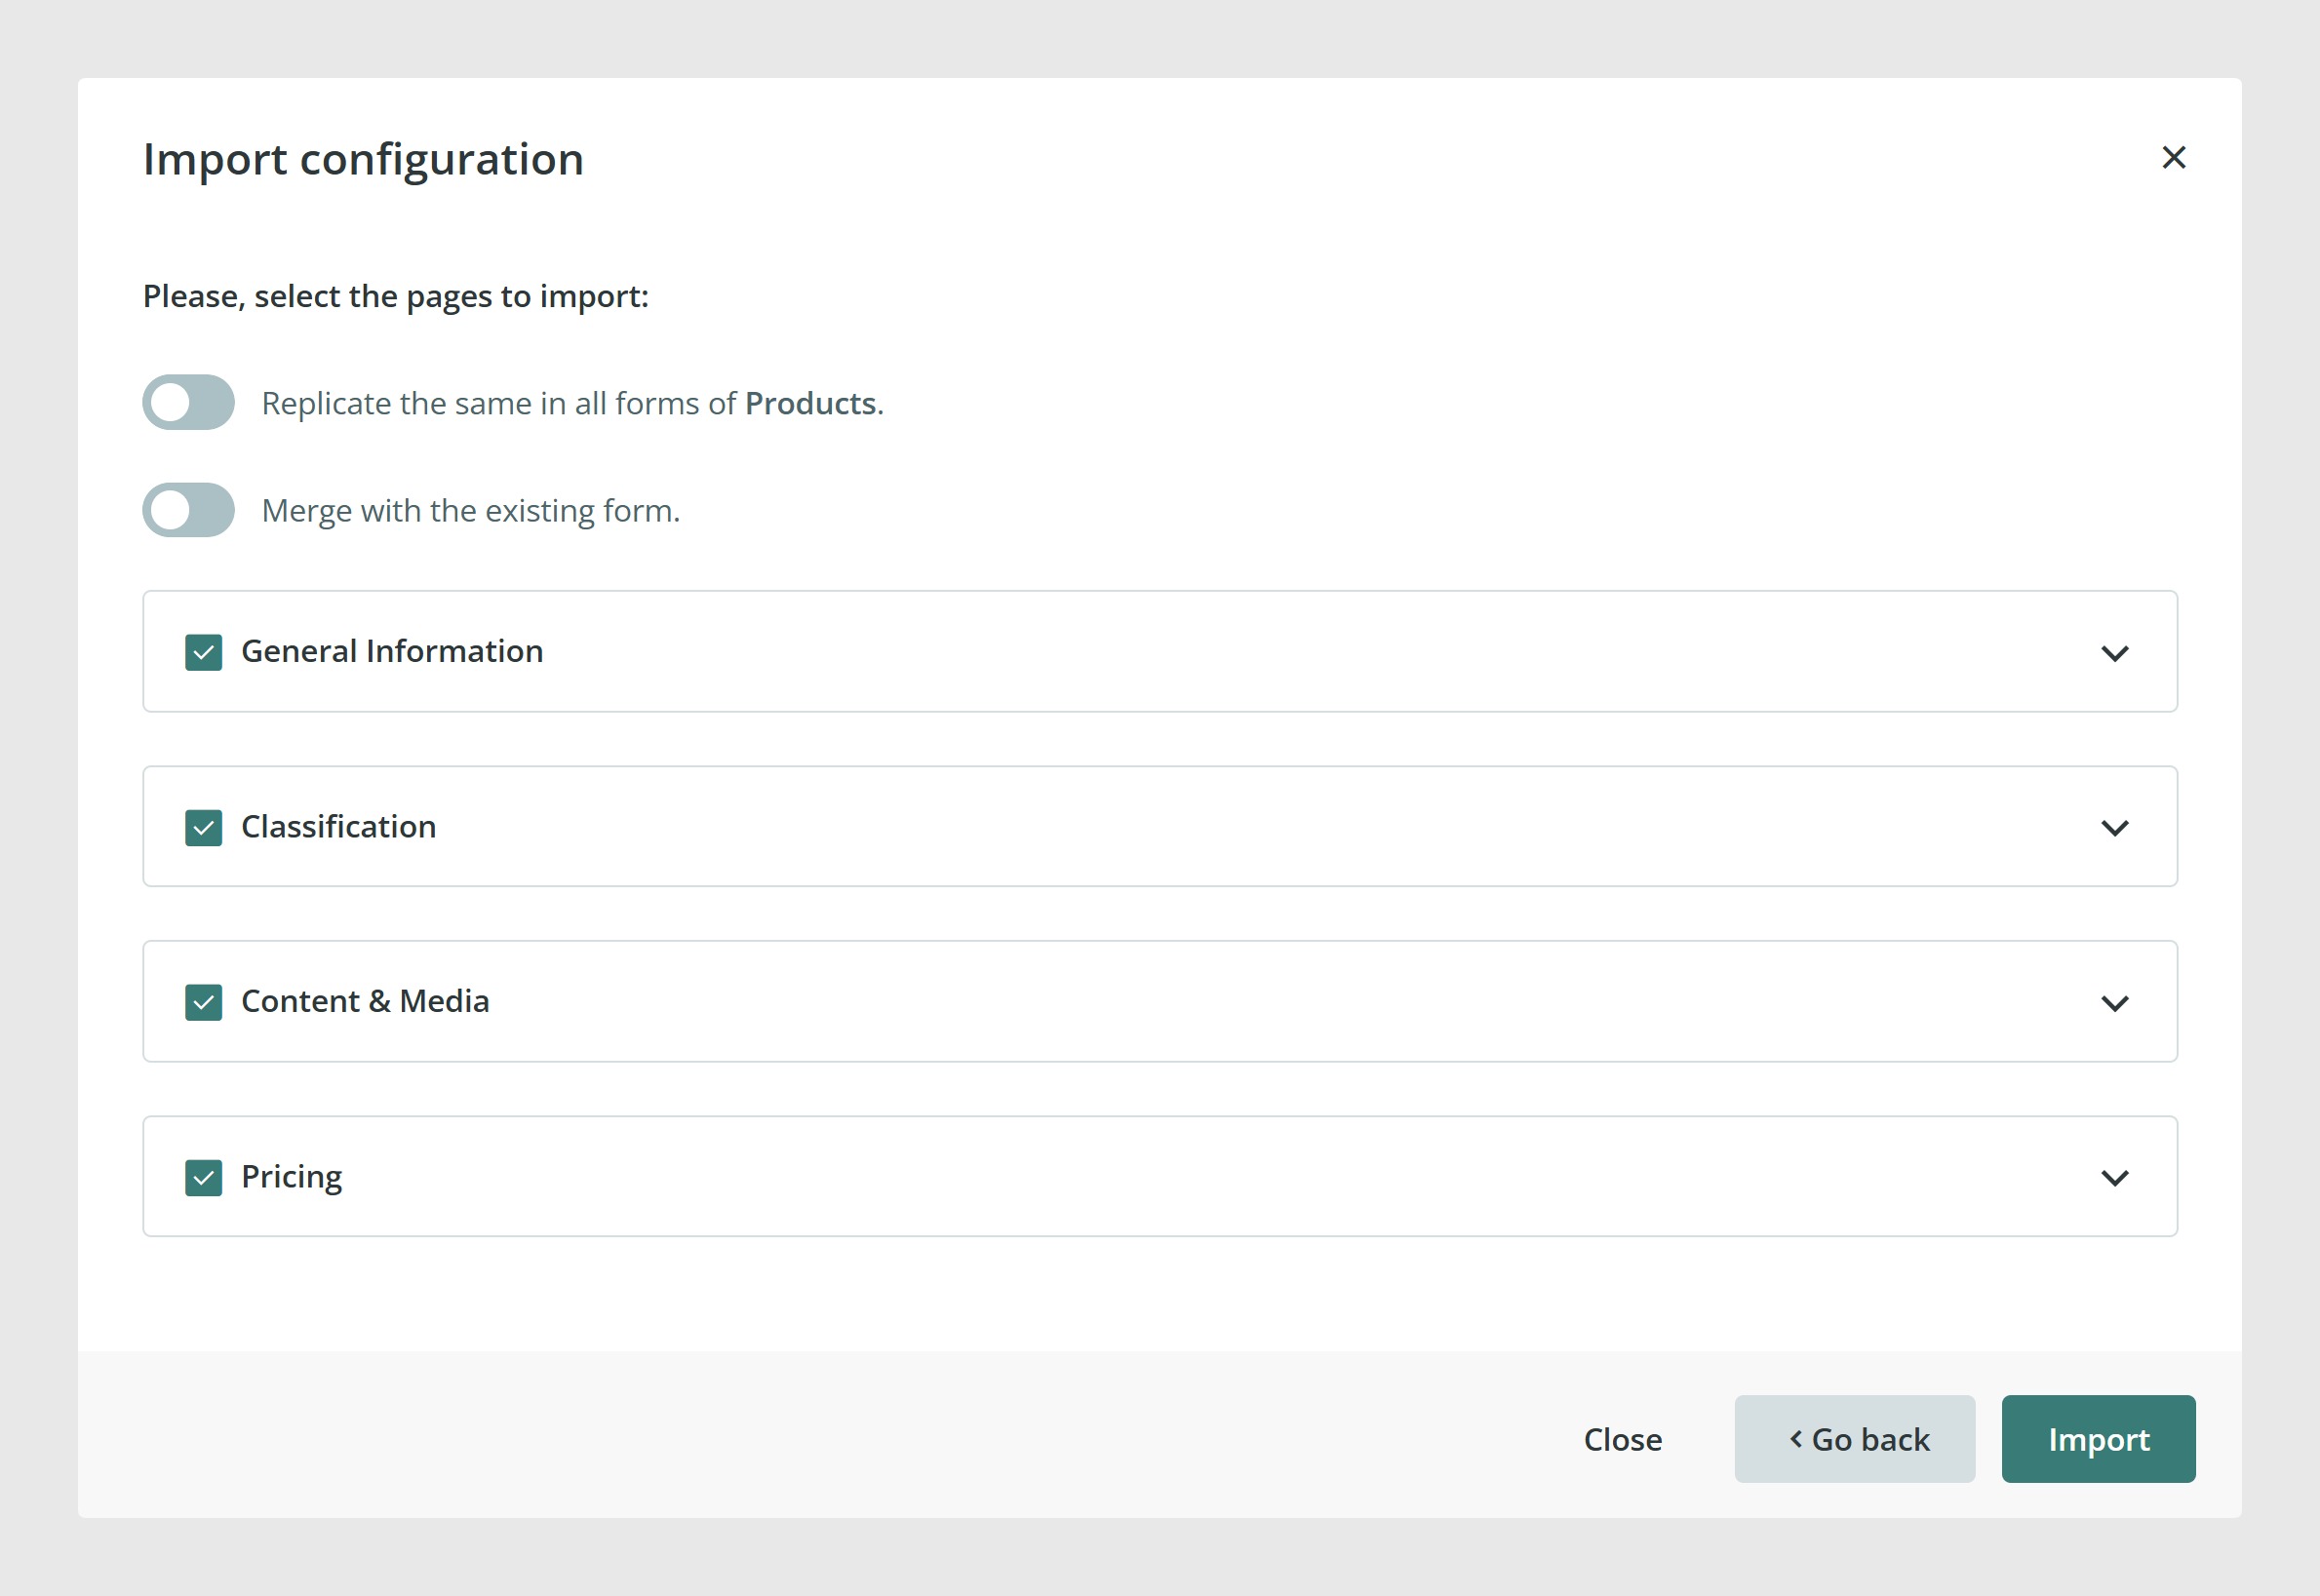
Similarly, to import a configuration, go to Edit forms > Actions > Import configuration.
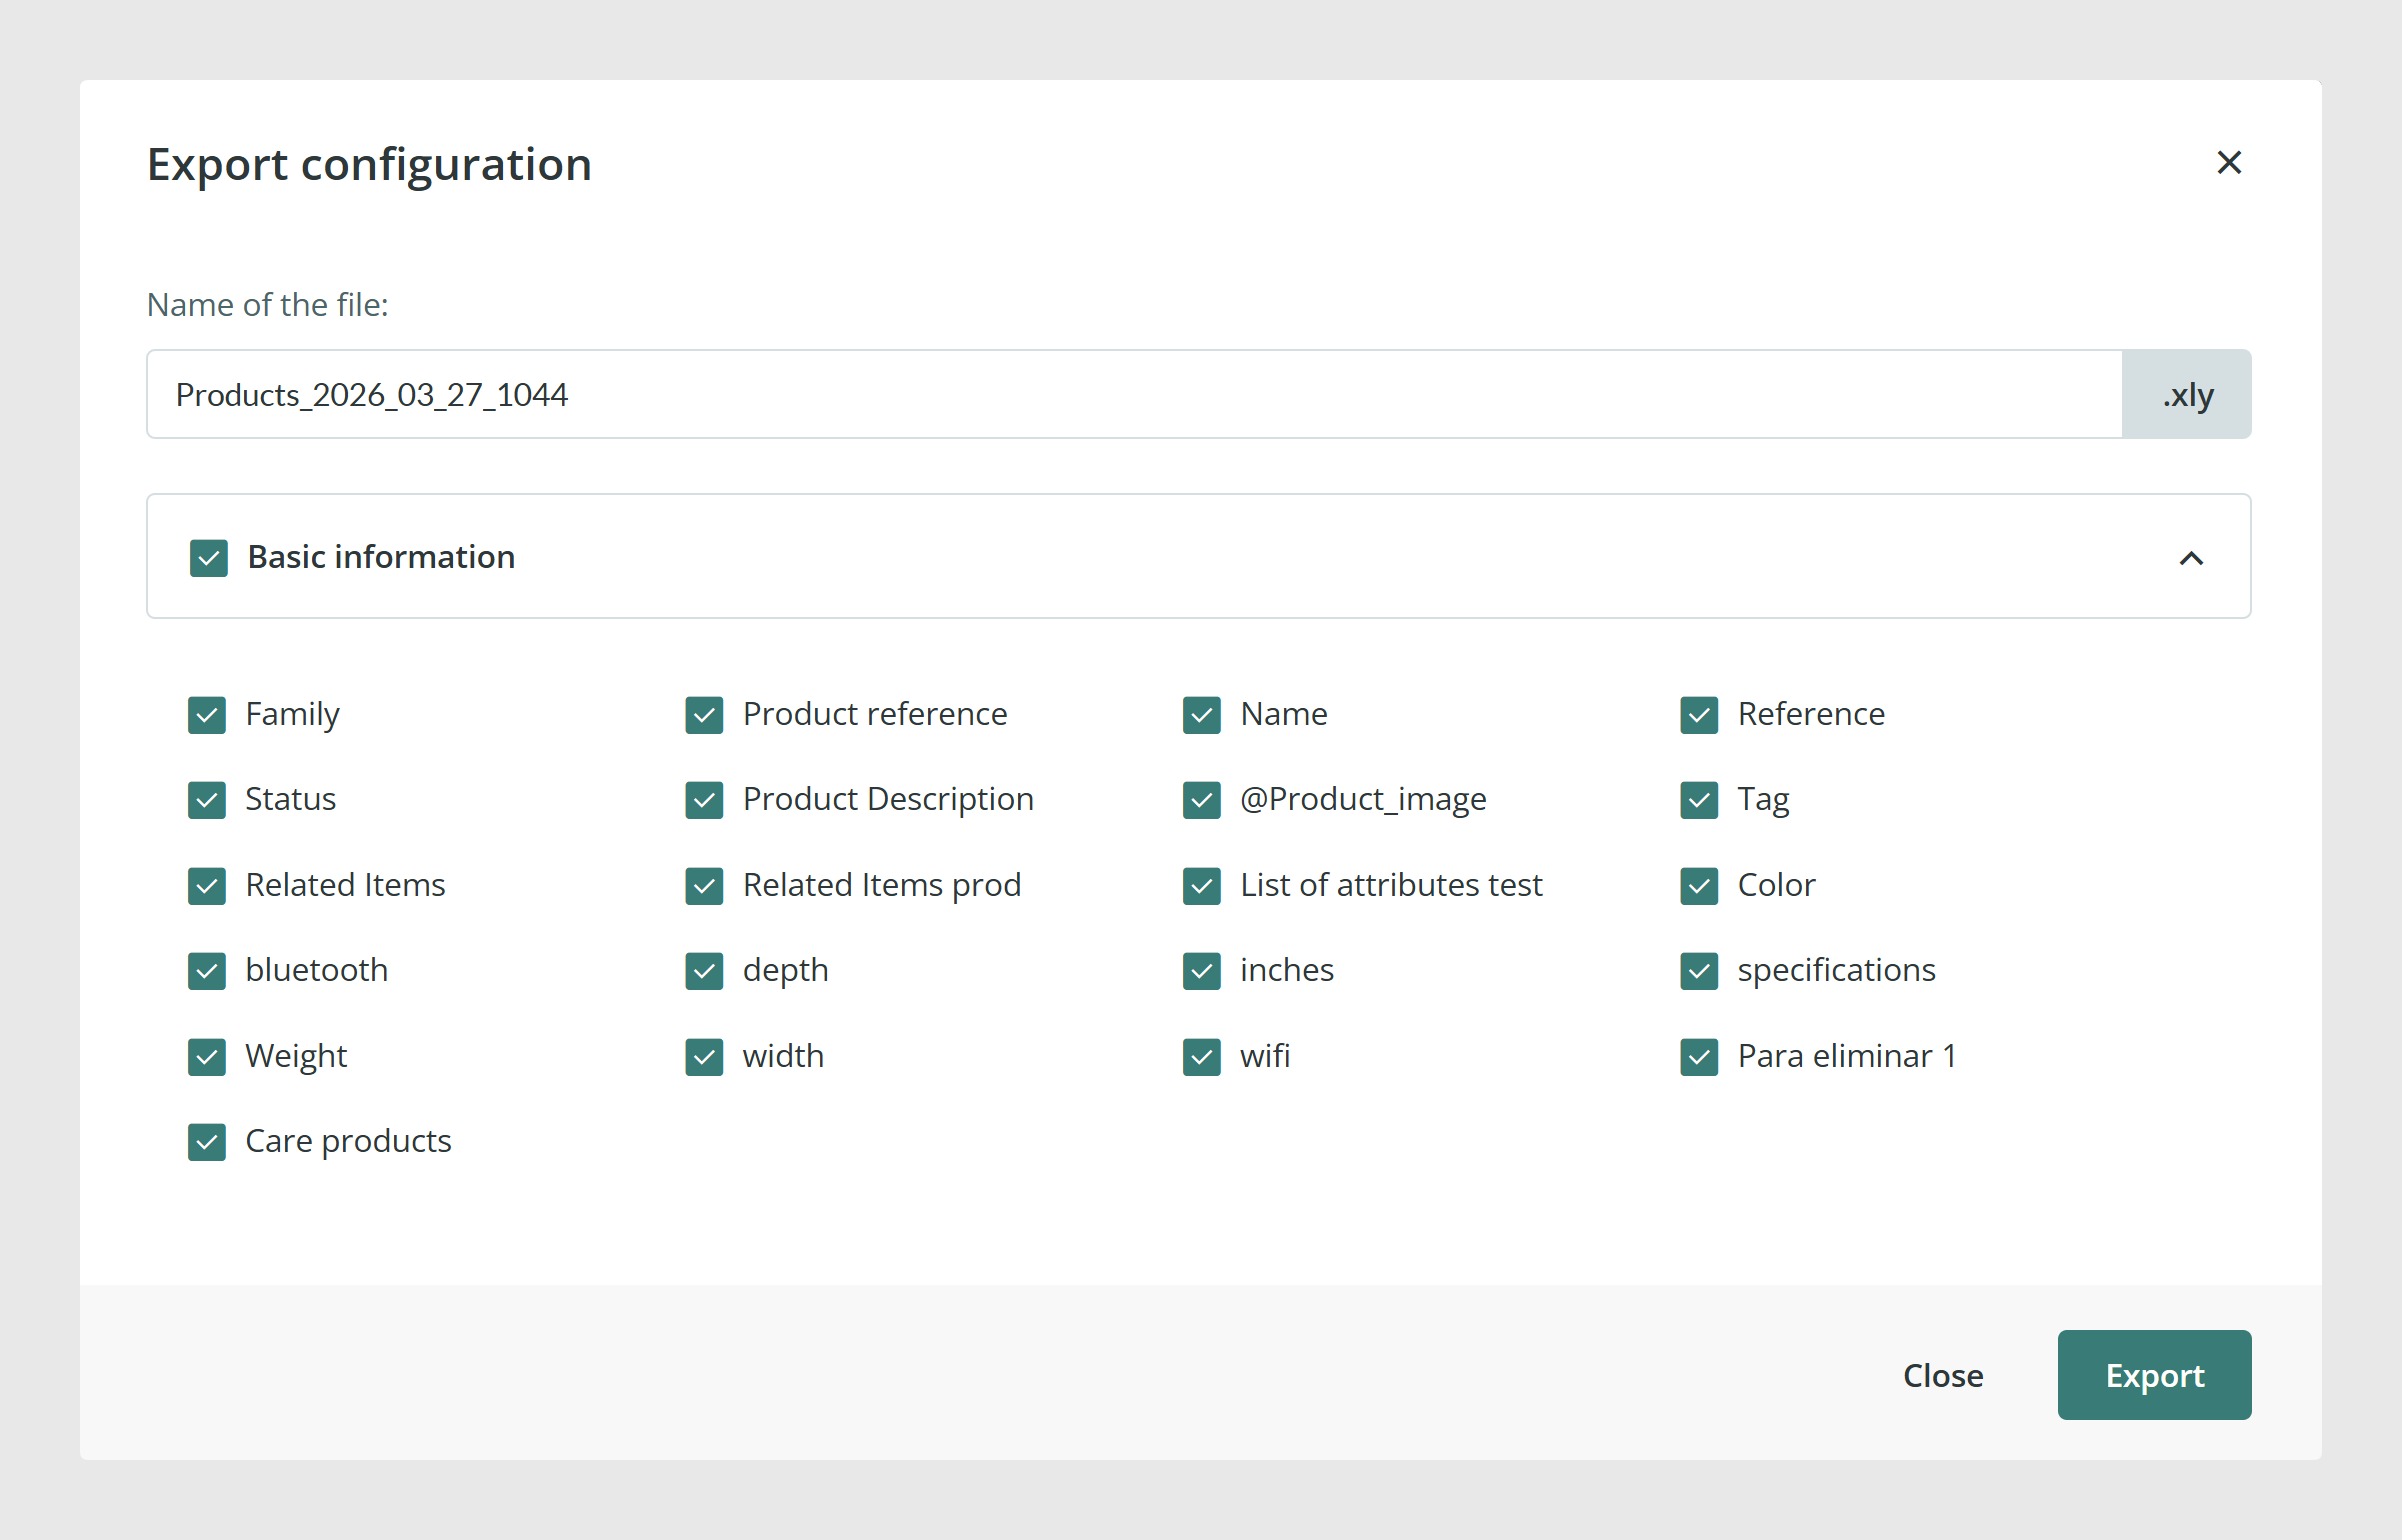
When exporting, you can choose which fields to include. When importing the file again, you can choose which parts of the configuration to reuse.
This is useful when you want to standardize similar product structures without building each one from scratch.
Common Use Cases
- Create different product forms for different product types
- Create an Attribute Set automatically during a product import
- Prepare a new form structure before loading products
- Reuse the same structure across several Attribute Sets
- Create a form that also works well for variants
Best practices
Before creating a new Attribute Set, check whether you really need a separate structure or whether an existing one can already cover that product type. Keep the structure clear from the beginning, group related fields into tabs or sections, and avoid creating more Attribute Sets than necessary. This makes the catalog easier to manage as it grows.
Was this article helpful?
That’s Great!
Thank you for your feedback
Sorry! We couldn't be helpful
Thank you for your feedback
Feedback sent
We appreciate your effort and will try to fix the article