Variants are useful when you want to manage products that share most of their information but differ in a few specific values, such as size, colour, or fit. This helps you avoid repeating the same product information again and again.
In Sales Layer, variants are linked to products through the product reference. Because of this, the product must already exist before you import its variants.
Prepare your Excel file
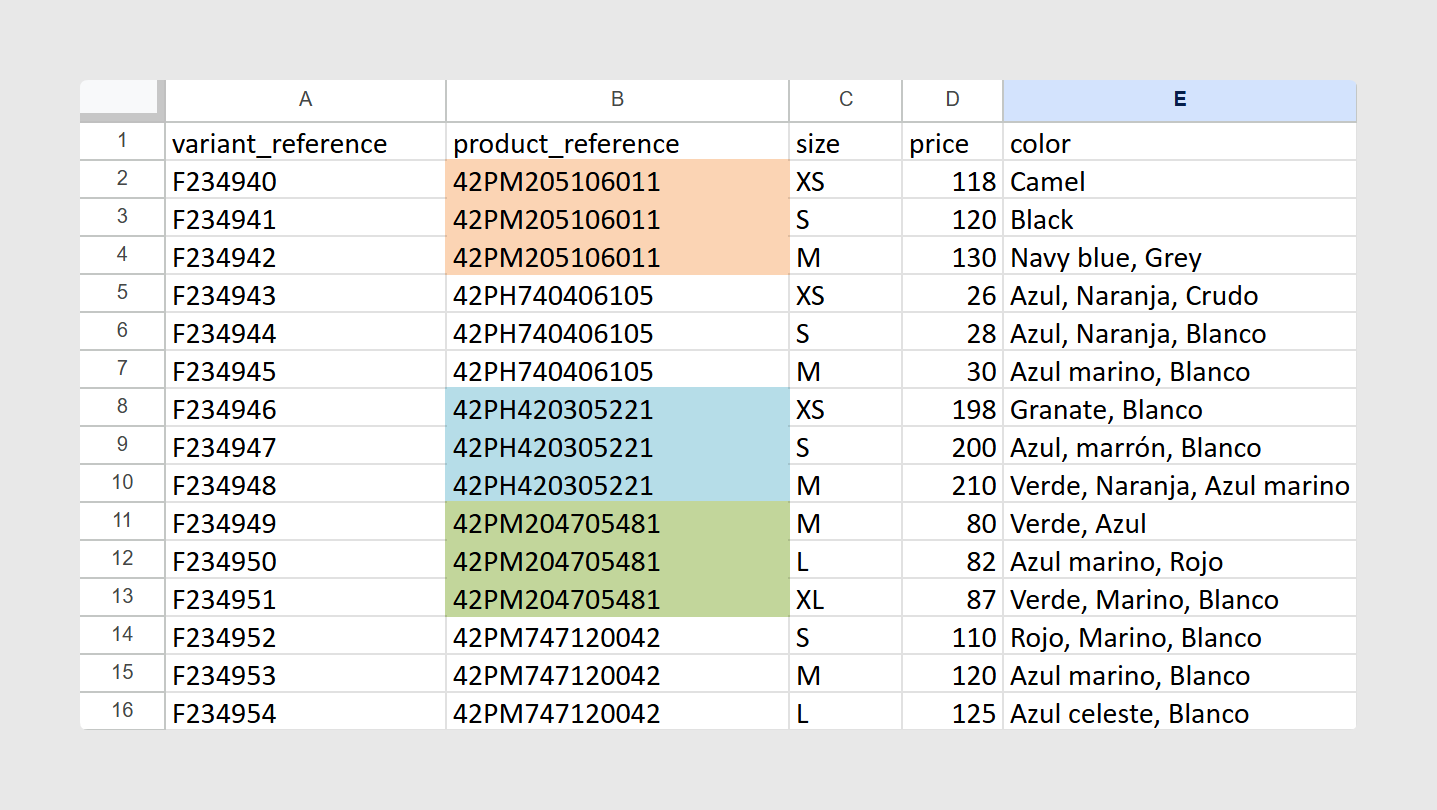
When preparing your spreadsheet, each row should represent one variant. The file should already be organized in columns before you paste it into Sales Layer.
Excel imports support up to 25,000 items at a time. You can also import up to 750 columns in a single Excel or CSV import.
Once your spreadsheet is ready, copy the rows from Excel and paste them directly into the import window in Sales Layer.
Include the required reference fields
For a variant import to work correctly, there are two key reference fields you should include:
- Product Reference, used to link the variant to its parent product
- Variant Reference, used to identify each variant individually
These are the most important fields in the import because Sales Layer uses them to understand which product the variant belongs to and whether the row creates a new variant or updates an existing one.
Add the variant-specific fields
After the reference columns, add the fields that contain the values that change from one variant to another. Common examples include:
- Size
- Colour
- Fit
- Price
- EAN or other identifiers
For example, if you are importing T-shirts with several sizes, you may have one row per size, all linked to the same product reference, while the size value changes in each row.
Review field mapping before importing
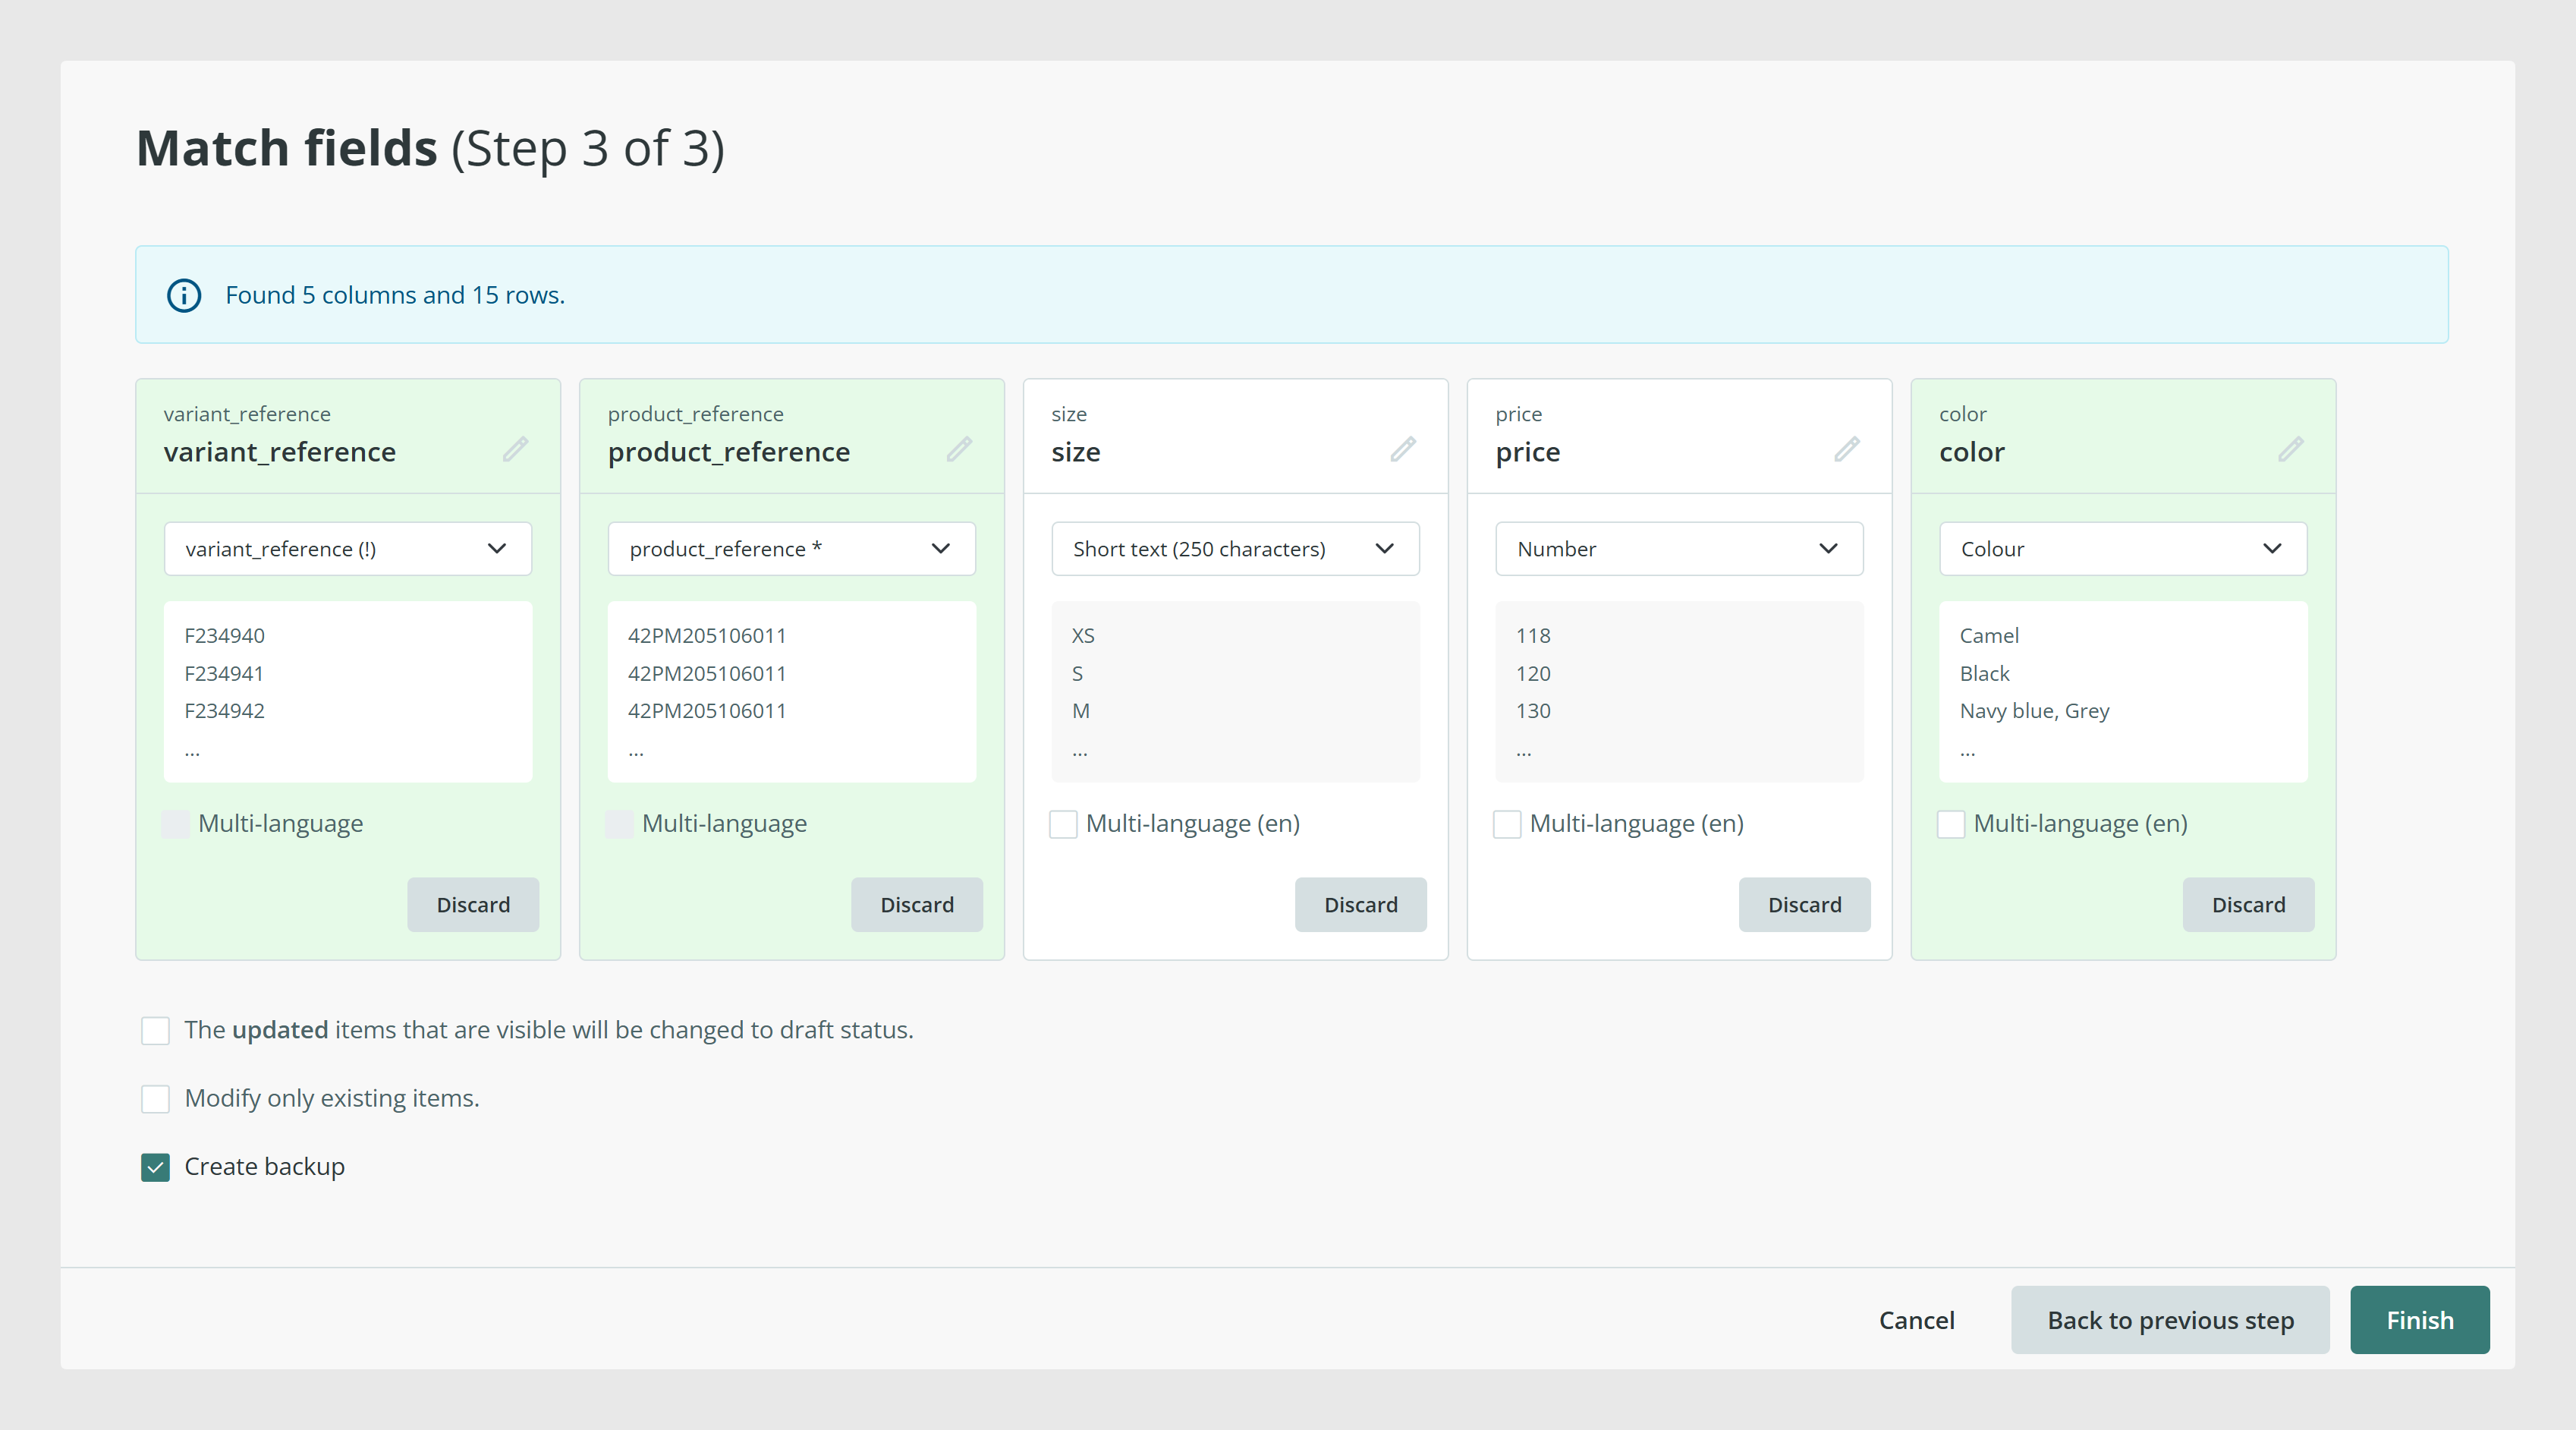
After you paste the data, Sales Layer shows the detected columns so you can review how they will be imported.
Recognized fields appear with a green background. In a variant import, Sales Layer usually recognizes the Product Reference field and the Variant Reference field automatically. New or not yet confirmed fields appear with a white background.
At this stage, you can:
- match a column to an existing field
- create a new field
- change the field title
- change the field type
- discard a column you do not want to import
Sales Layer remembers the mapping you confirm, which makes future imports easier when you use a similar structure again.
Choose suitable field types
When a field is new, it is important to check that the selected field type matches the content you are importing.
For example, if your variant field contains values such as sizes, a List of attributes field may be a good option. If each variant should only have one value, such as one size per row, you can configure that field so multi-selection is not allowed.
This is especially useful for structured variant data, because it keeps your options consistent across all variants.
Once you have reviewed the references, fields, and field types, click Import to create the variants in Sales Layer.
After importing, you can open a product and view its variants in more detail. Sales Layer also shows products with variants using a specific icon, so they are easier to identify.
Update variants
You can use the same Excel import process later to update existing variants.
To do this, go to Variants, click Import, choose the import method, and paste the updated rows.
If you want to update existing variants, include the Variant Reference column together with the field or fields you want to change. Sales Layer uses the existing variant reference to update the record.
If you are changing a field that supports multiple values, such as images, files, related items, tags, or a list field with multi-selection enabled, you can also use the ++ and -- operators before the first value to add or remove specific values without replacing everything in the field.
Understand the re-import options
When you reimport variants, Sales Layer may show extra options at the bottom of the import window depending on your setup.
- New items will be saved as draft: new variants created by this import will be added in draft status
- Force import in locked fields: updates locked fields too
- The updated items that are visible will be changed to draft status: visible variants that are updated will move to draft after import
- Modify only existing items: updates existing variants only and ignores any new variant references in the file
- Reimport links from existing files: reprocesses images from the Excel or CSV as new while keeping existing links
- Generate backup: creates a backup copy if there is no recent one
These options are useful when you are working in a live catalog and want more control over how updates are applied.
How variants work with Attribute Sets
Variants inherit the Attribute Set of their parent product. This means they can use the fields defined for that product structure, which helps keep product and variant information aligned.
This also means that the way your product form is set up affects how variant data is managed.
Common use cases
- Create sizes or colours for one parent product without duplicating all product information
- Import large sets of variants from an existing spreadsheet
- Update prices, identifiers, or option values for existing variants
- Standardize variant values using list fields
- Keep product-level and variant-level data clearly separated
Best practices
Before importing variants, make sure the parent products already exist and that your references are clean and consistent. Use one clear variant reference per row, review the field mapping carefully on the first import, and choose structured field types for values like size or colour whenever possible. This makes future updates much easier and helps keep variant data consistent across the catalog.
Was this article helpful?
That’s Great!
Thank you for your feedback
Sorry! We couldn't be helpful
Thank you for your feedback
Feedback sent
We appreciate your effort and will try to fix the article