First steps
To create a new channel you must click on the Channels tab inside Sales Layer and select Add New Connector.
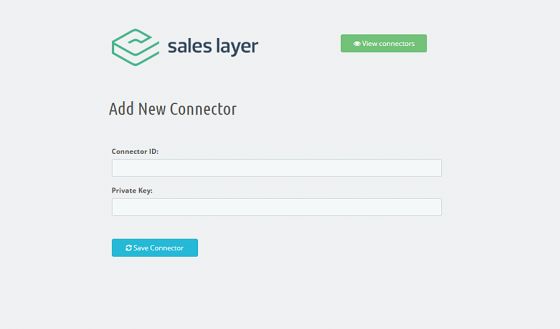
To connect the Sales Layer plugin you need to simply copy and paste the credentials you can find at the channel configured in Sales Layer and press Save connector.
In case the ID and private key are correct, your new channel will show up in the channels page.
To work automatically, the plugin requires that the Prestashop cronjobs remains active and working. The recommended frequency for the cronjobs is 5 minutes. However, if those jobs are already being used for other tasks, you can set it with a period of between 1 and 30 minutes. The plugin automatically adjusts the time for the synchronization process: it will calculate the difference between each execution and, in case the server is not overloaded, it will call the process again to keep on synchronizing.
If there has been a server overload, it won’t be automatically executed. In that case, the synchronization will go on when the cron is executed again (in the background, so the server doesn’t cut due to the overload: the website will continue working normally).
Warning: The URL must be active and available for the Cron to work correctly. It is important that the store is an active store with the domain available for the call. To confirm that it has been done properly, you just need to verify the URL of the task - created for the Sales Layer plugin - in the Cronjobs module in PrestaShop.
You can set the channel as active choosing from the