Example 5 - Exporting to a Database
Introduction and data structure
In addition to exporting information, our SDK can send this information to a database through the SalesLayer_Updater () class. The SalesLayer_Updater () class is an extended class of the SalesLayer_Conn () class. It adds the necessary functions to export the schema of the fields belonging to a connector in Sales Layer and creates the tables and fields in the chosen database.
In this example we will see how to export the information from the PIM to a local database using the SalesLayer_Updater () class.
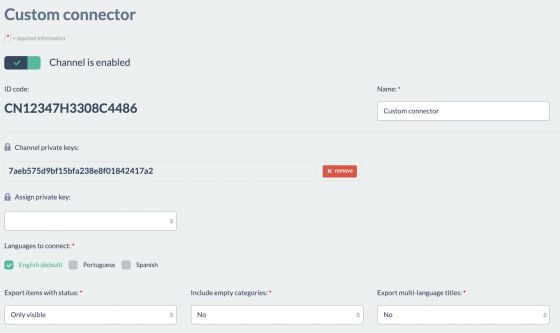
To export the information to a database we will use a generic connector. Once again it is the connector created in Example 1, with the same table configuration (see table configuration in example 1) and the same filters and parameters:
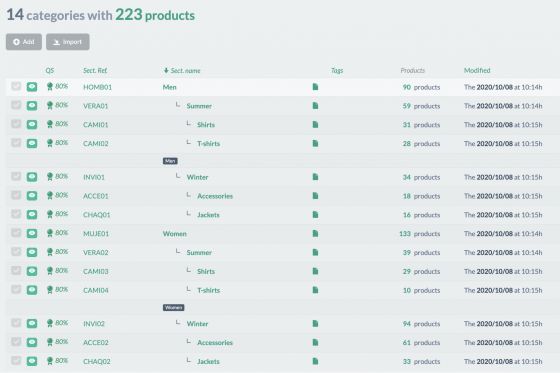
In this example, we set 14 categories as visible:
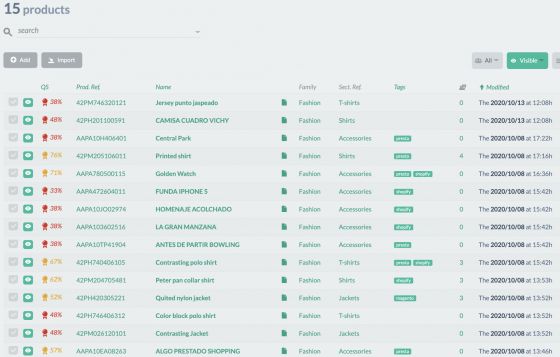
We choose 15 random products and set them as visible, too:
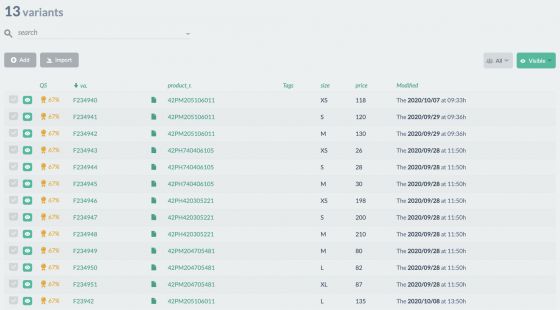
The variants of these products will also be set in visible mode. As a result, we will have a total of 13 variants:
Code
The script which exports the information will look like this:
<?php

define('LOC_BASE', dirname(__FILE__) . '/');

require(LOC_BASE.'SalesLayer-Updater.php');

require(LOC_BASE.'lib/nice_r-master/Nicer.php');

?>


<!DOCTYPE html>

<html dir="ltr" lang="en-US">

<head>

    <link rel="stylesheet" type="text/css" href="lib/nice_r-master/nice_r.css?version=<?php echo filemtime(LOC_BASE.'lib/nice_r-master/nice_r.css'); ?>"/>

    <script type="text/javascript" src="lib/nice_r-master/nice_r.js?version=<?php echo filemtime(LOC_BASE.'lib/nice_r-master/nice_r.js'); ?>"></script>

</head>

<body>

    <?php


    //DB credentials

    $dbname       = 'testesl';

    $dbhost       = 'localhost';

    $dbusername   = 'root';

    $dbpassword   = 'root';


    //SL credentials

    $connector_id = 'CN12347H3308C4486';

    $secret_key = '7aeb575d9bf15bfa238e8f01842417a2';


    //Create object with the credentials of the connector and database

    $SLConn = new SalesLayer_Updater ($dbname, $dbusername, $dbpassword, $dbhost, $connector_id, $secret_key);


    $SLConn->update();


    echo "Sync Initialized";


    if ($SLConn->has_response_error()) {


        echo "<h4>Error:</h4>\n\n Code: ".$SLConn->get_response_error().

             "<br>\nMessage: ".           $SLConn->get_response_error_message();


    } else {


        echo "<h4>Response OK</h4>\n".

             "<p>".

             "API version: <b>".            $SLConn->get_response_api_version()          ."</b><br />\n".

             "Time: <b>".                   $SLConn->get_response_time('unix')                 ."</b><br/>\n".

             "Default language: <b>".       $SLConn->get_response_default_language()     ."</b><br/>\n".

             "Database: <b>".       $SLConn->database     ."</b><br/><br />\n".

             "<br><b>SYNCHRONIZATION INTO THE DATABASE IS DONE, GOOD JOB!</b>".

             "</p>";


            $n = new Nicer($SLConn->get_response_table_data());

            $n->render();

            echo "<hr/>";


    }

    ?>

    </body>

</html>
We start by defining the credentials to access the database:
Warning: The SDK can create tables and fields in an already existing database but it is not ready to create the database itself. Therefore, this must be created previously
Now we can call the update() function to export from the items in Sales Layer to the database defined in the initial parameters. Whenever a call is made using the update() function, the current date is saved in the database, ready to be used in the next call. In this way, only the item modified until that moment will be exported.
In the first call, since there is no date in the database, all the items in the connector will be exported.
Through the has_response_error() function we can check if the API has returned any error, and we can now print the following relevant information using these SDK functions:
- The API version through the get_response_api_version() function
- UNIX date of the exact time of the API call with the get_response_time() function
- The default language of the PIM by calling the get_response_default_language() function
Thanks to the Nice_r library (click here for more info) we can now print the data returned by the API with the get_response_table_data().
Execution and its results
Running the script, we got the following result:
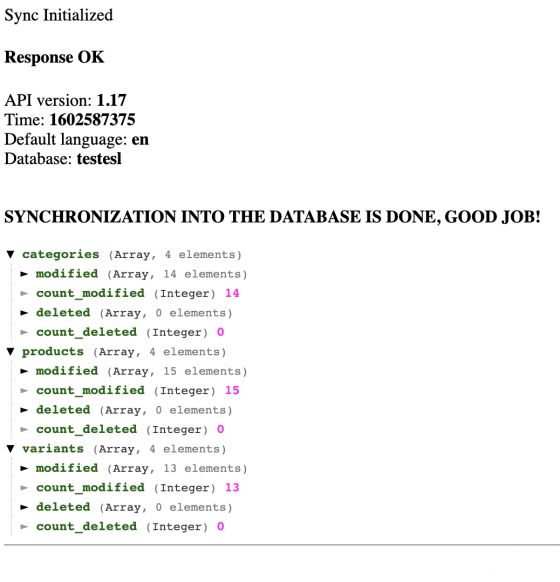
As we can see, the items in visible status have been exported by the API and well synchronized in the database.
In the database, 4 tables have been created with a number of rows corresponding to the visible items for each exported table.
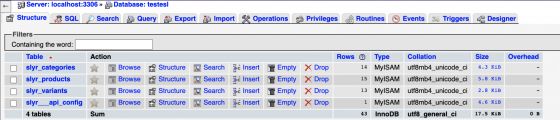
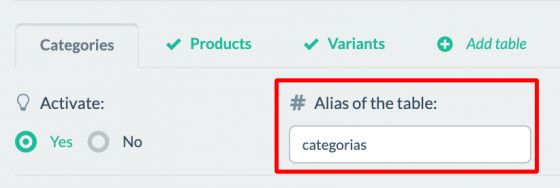
Warning: The names of the tables can be changed according to your preferences. Through the formula of the class SalesLayer_Updater(), set_table_prefix() **** you can define the prefix of the table ("slyr_" by default ). Through the alias of the table in the connector you can define the remaining nomenclature.
Apart from the tables already configured in the connector, the
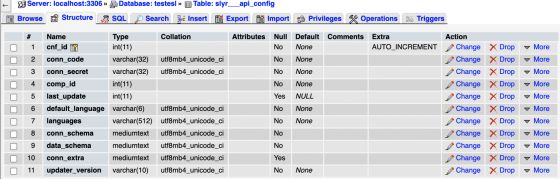
Among other fields, in this table we can see the last_update parameter where the date of the last call is saved. Keep in mind that this same date will be used in the next calls. We can also see the data_schema parameter. It saves the information of the data schema exported by the connector.